


You’re staring at that cracked, mustard-colored bathroom floor again, aren’t you? I’ve been there, trust me. Whether you’re stuck in a rental from the dark ages or just don’t have the budget for a full-blown renovation, removable bathroom floor tiles are your new best friend. I’m here to show you how to pull off a total floor glow-up without losing your security deposit or your sanity. Let’s turn that ‘yikes’ into a ‘yes’ together, one tile at a time.
The Magic of Temporary Flooring
Why do we settle for ugly floors? Honestly, we shouldn’t. Removable tiles—often called peel-and-stick—offer a genius loophole for anyone who hates their current aesthetic but lacks a sledgehammer. I remember my first apartment had floors that looked like they belonged in a haunted hospital. I slapped down some marble-patterned vinyl, and suddenly, I felt like a functional adult who actually enjoys brushing their teeth.
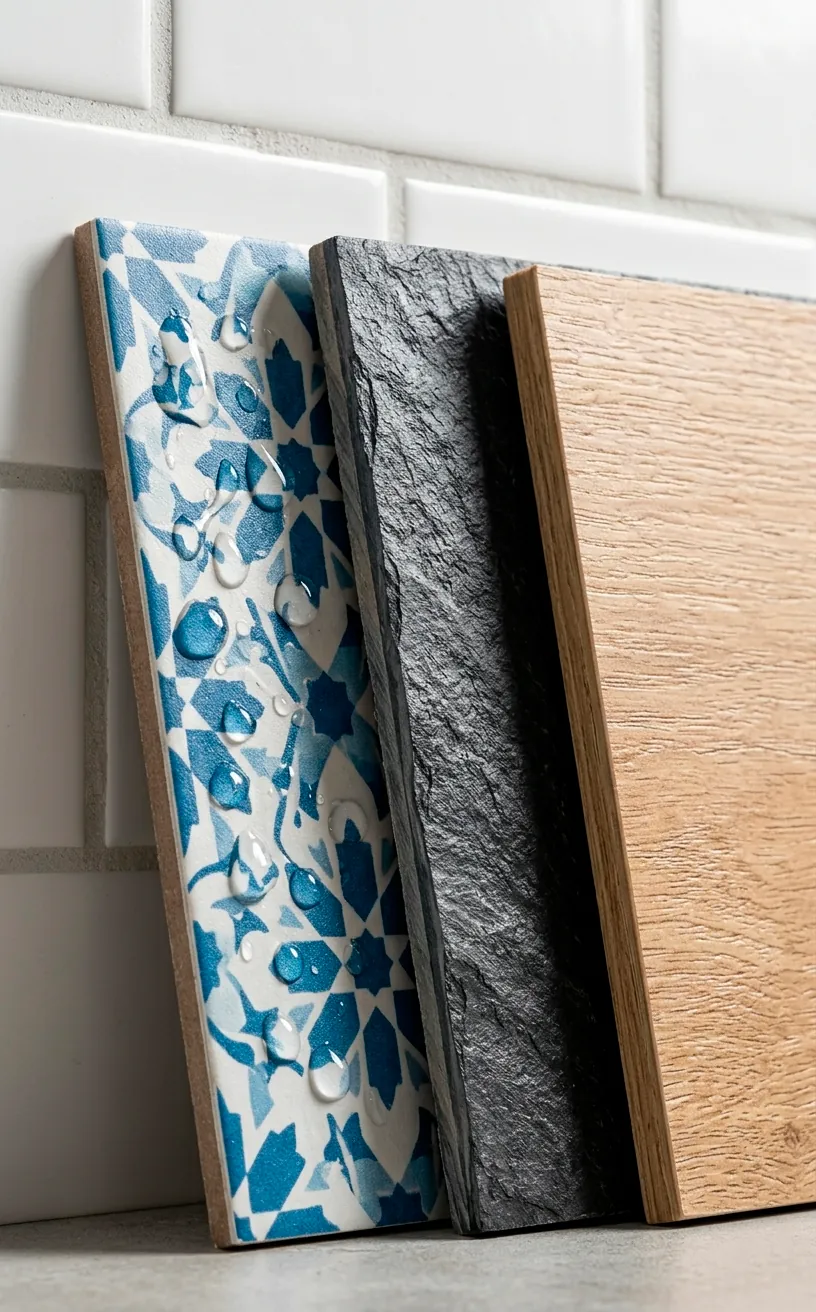
These tiles aren’t just cheap stickers; the tech has come a long way. You get thick, durable materials that mimic stone, wood, or encaustic patterns so well your guests will actually bend down to touch them. Do you want a luxury vibe without the luxury debt? This is your ticket to the big leagues of home decor.
Choosing the Right Material for Your Splash Zone
Not all removable tiles can handle a post-shower flood, so don’t just grab the first pretty pattern you see. You want waterproof vinyl, period. Some ‘water-resistant’ options exist, but in a bathroom, you need something that won’t curl at the edges the second you step out of the tub. Look for ‘virgin vinyl’—it’s more stable and less likely to shrink or expand when the room gets steamy. Have you checked the thickness yet? Aim for at least 1.5mm to 2mm for a premium feel underfoot.
Preparation is Everything
I know, I know—prep work is as exciting as watching paint dry. But listen, if you skip this, your tiles will start migrating across the room like confused penguins. You must scrub that floor until it’s spotless. Any hair, dust, or weird sticky residue from the previous tenant will ruin the adhesive bond.
First, hit it with a heavy-duty degreaser. Then, wipe it down with isopropyl alcohol to remove any lingering oils. FYI, a clean floor is the only thing standing between you and a DIY disaster.
Does the floor have deep grout lines? You might need to fill those with a bit of floor primer or a leveling compound if you want a perfectly flat finish. Otherwise, you’ll see the ‘ghost’ of the old tiles through your new ones.
If you’re dealing with a tiny, awkward layout, you’ll need to maximize every inch of space to keep things organized. Check out this guide to vertical storage for ideas on keeping your workspace tidy while you renovate.
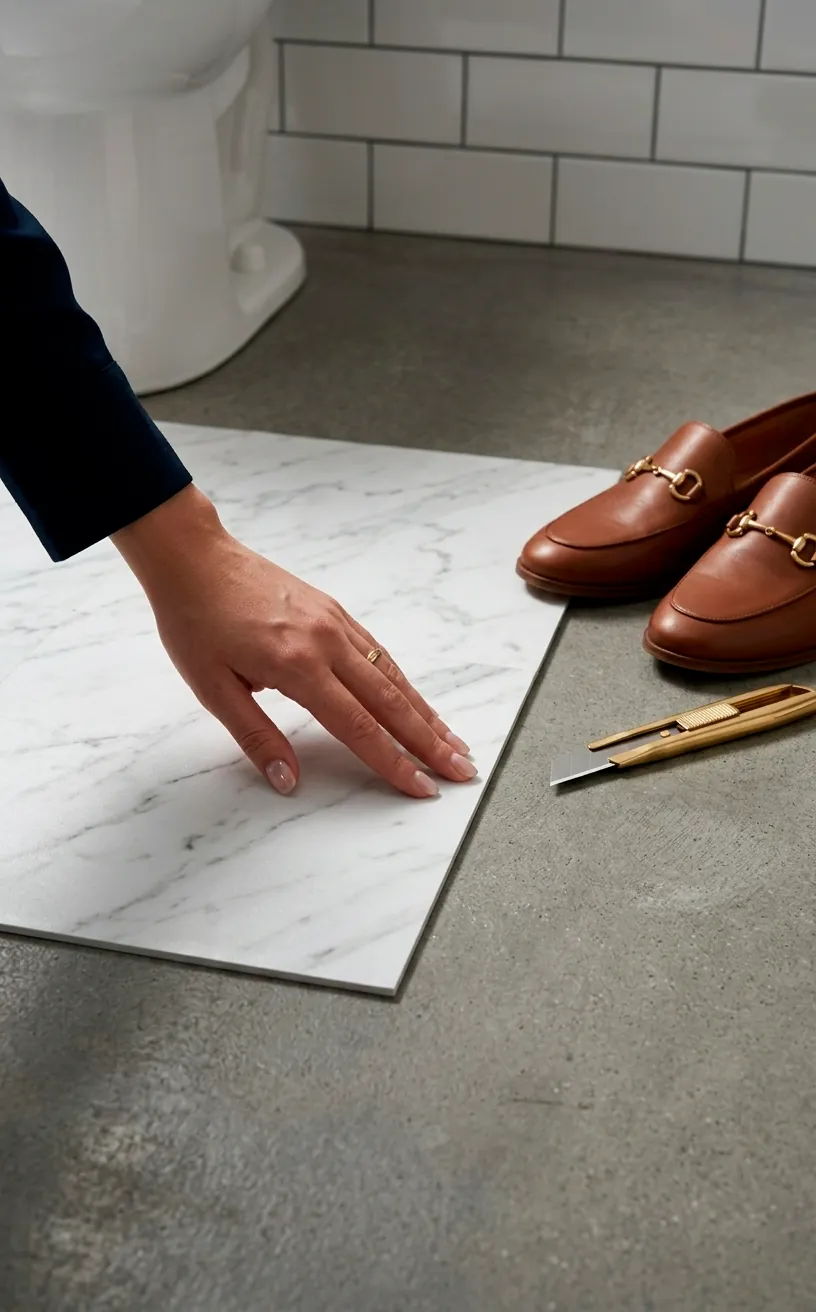
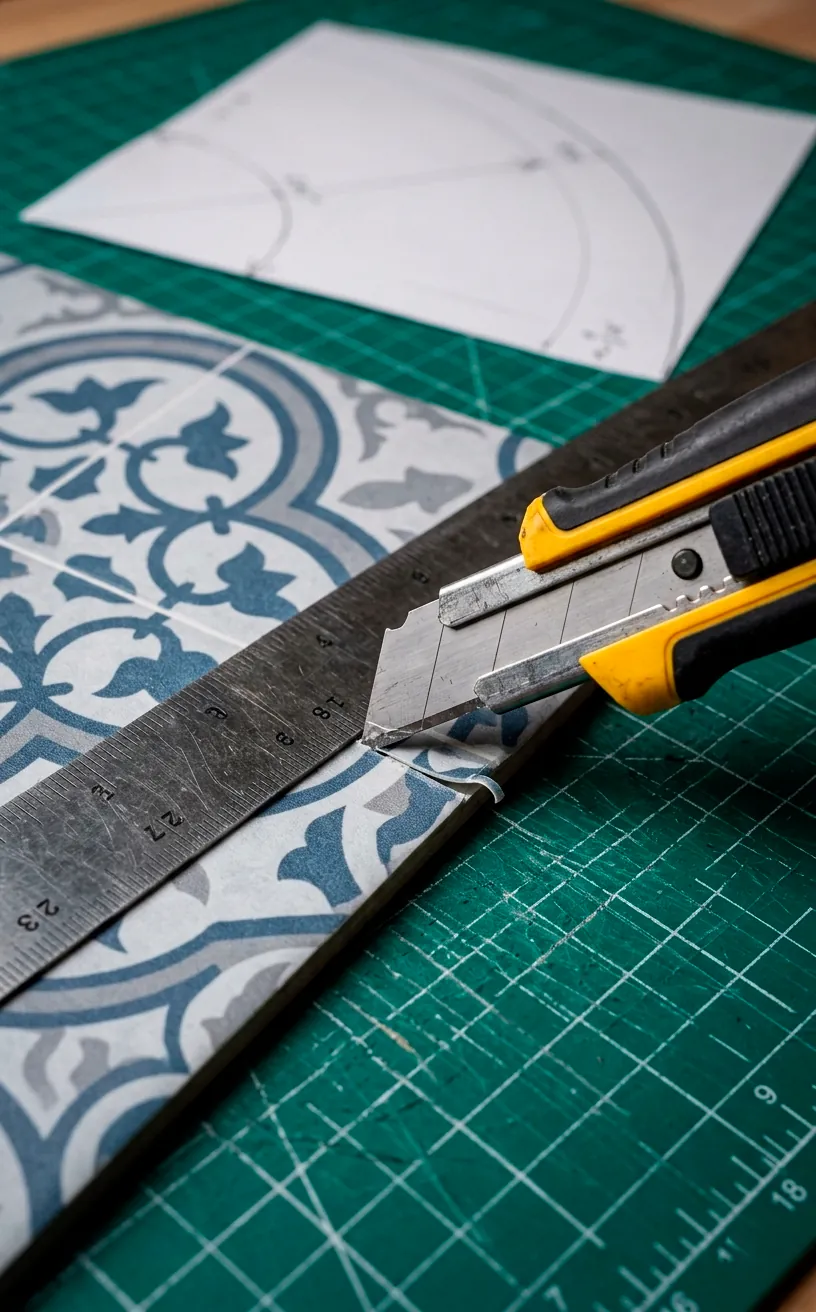
The Art of the Perfect Cut
Measuring once and cutting twice is a great way to waste twenty bucks. Grab a sharp utility knife and a metal straightedge. When you get to those annoying curves around the toilet, don’t panic. Create a template using cardboard or heavy paper first. Trace the base of the toilet, cut the paper, and then use that as a stencil for your tile. It’s a literal lifesaver for your sanity. Ever tried to freehand a curve on vinyl? It usually ends in tears and a very jagged-looking toilet base.
Installation: Start from the Center
Don’t just start in a corner and pray. If your walls aren’t perfectly square (spoiler: they never are), your pattern will look crooked by the time you reach the other side. Find the center of the room by snapping chalk lines. Start your first tile where those lines cross.
Work your way out in a ‘cross’ pattern, then fill in the quadrants. This ensures that the cut tiles at the edges are roughly the same size on both sides, which looks way more professional.
Apply firm pressure to each tile once it’s down. I like to use a small hand roller to really lock that adhesive into the subfloor. It’s satisfying and prevents those annoying air bubbles from forming later.

Removal: The Great Escape
So, your lease is up, or you’ve finally decided to go for real tile. How do you get these things off without ruining the subfloor? It’s easier than you think, but don’t just rip them up like a Band-Aid. Use a hairdryer to heat the corners of the tile. This softens the glue and lets the tile slide right off. 😅
If there’s any sticky residue left behind, a bit of Goo Gone or warm soapy water usually does the trick. I’ve moved three times in five years, and I’ve never lost a security deposit because of these floors. Just take your time and don’t be a barbarian about it.

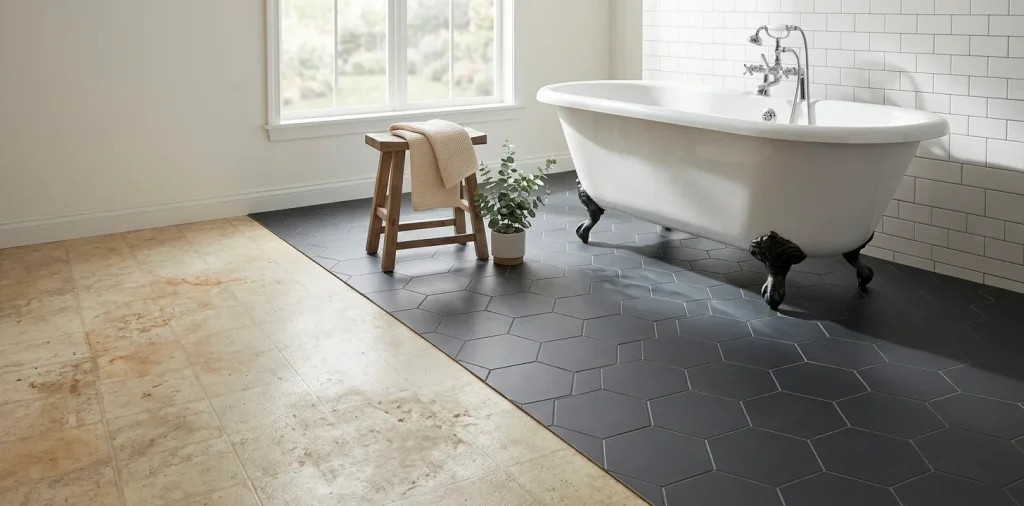
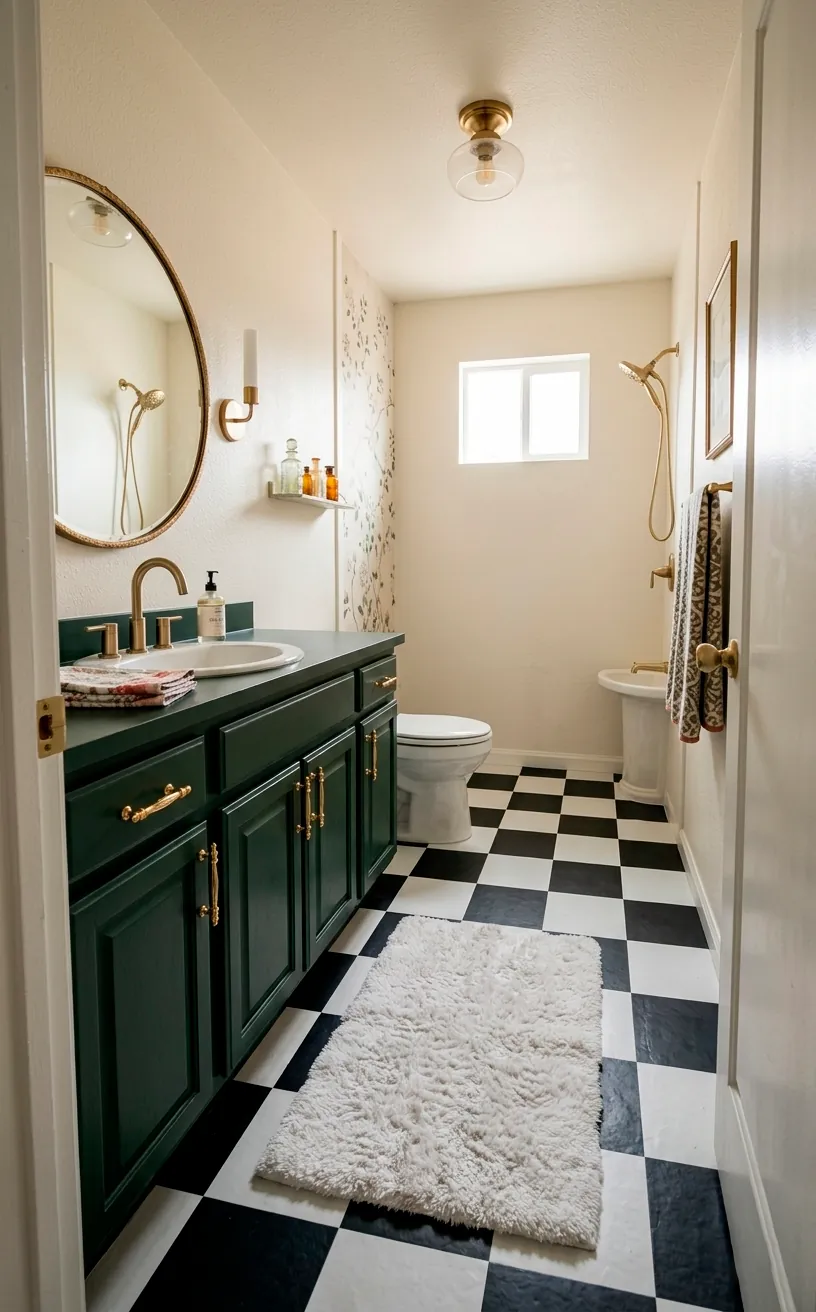
Design Trends to Obsess Over
Right now, it’s all about bold patterns and moody colors. Checkerboard is having a massive comeback, but in muted tones like sage green or terracotta rather than just diner-style black and white. If you’re feeling brave, go for a dark, dramatic look.
Black floors can make a small bathroom feel incredibly chic and grounded. I’ve seen some amazing setups where people pair dark floors with gold accents for a high-end ’boutique hotel’ vibe.
Speaking of dark and moody, you might find some serious inspiration in this midnight black attic bathroom. It proves that going dark doesn’t have to be scary.
Geometric shapes like hexagons are also huge right now. They add a bit of visual complexity that makes the space feel architecturally interesting, even if it’s just a standard rectangle of a room.
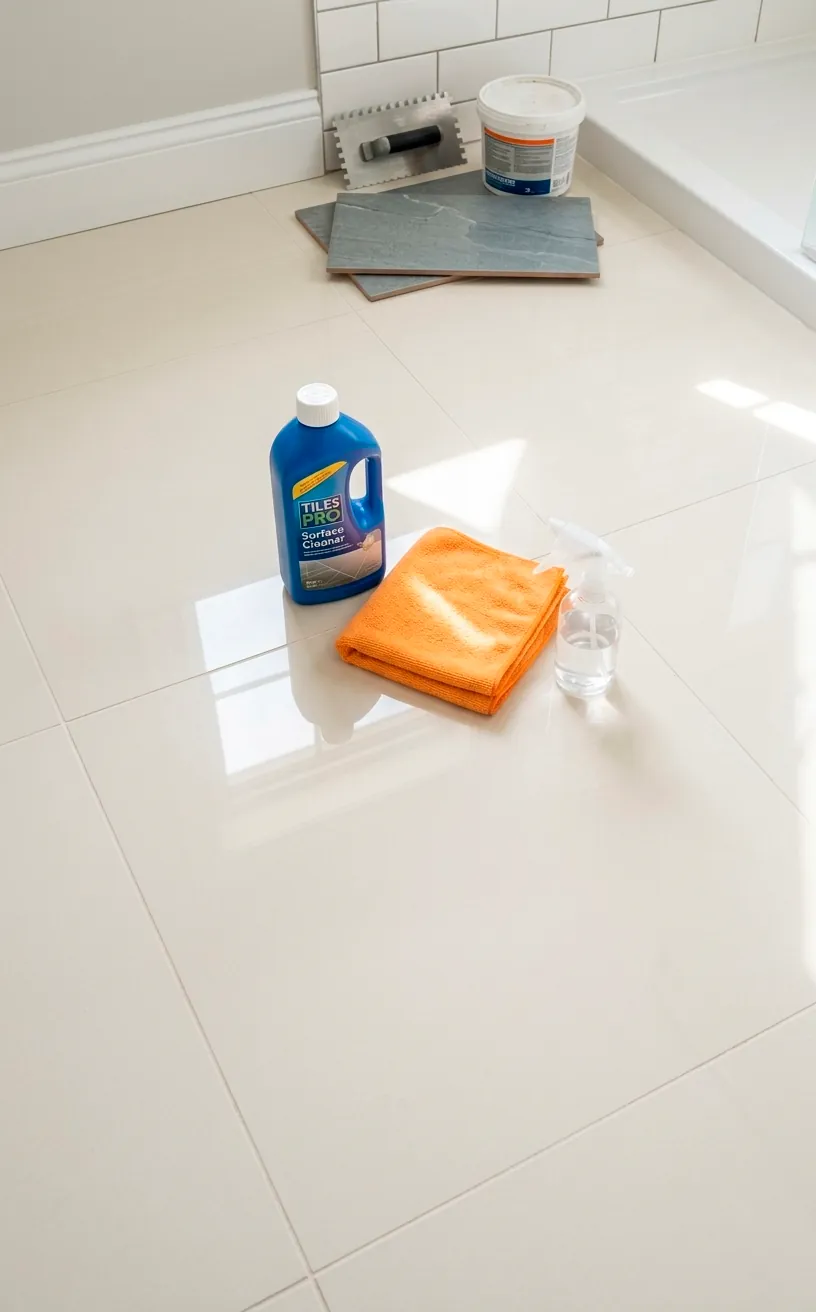
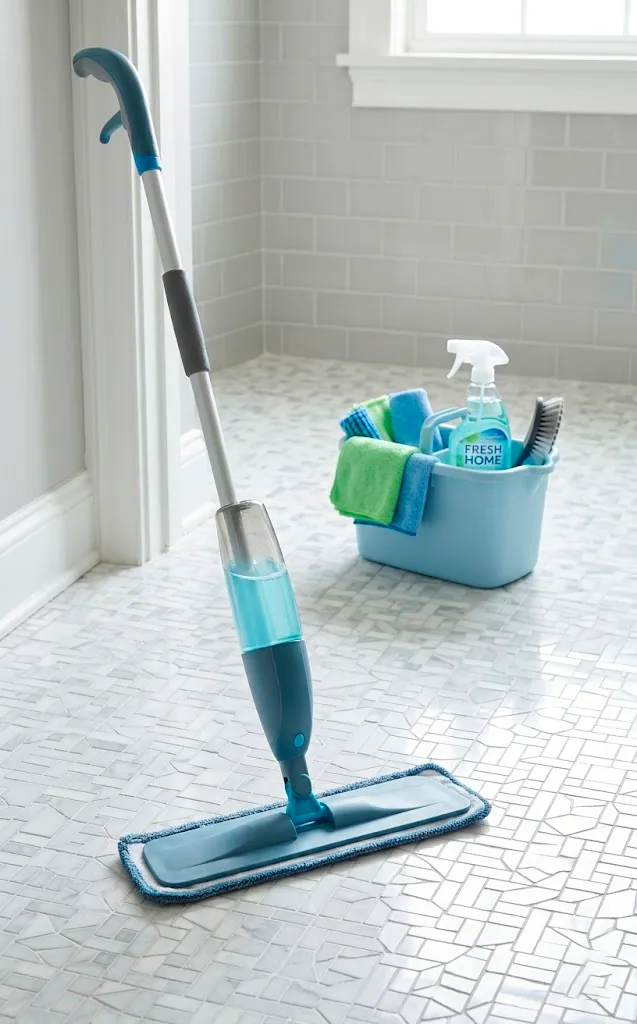
Cleaning and Long-Term Care
You can’t just douse these in bleach and hope for the best. Treat them with a bit of respect! Use a damp mop and a pH-neutral cleaner. Avoid excessive water; if you leave a puddle sitting on the seams, it can seep underneath and weaken the glue over time. I usually just use a spray bottle with a mild vinegar solution and a microfiber mop. It’s fast, easy, and keeps the shine without the harsh chemicals. Ever noticed how some cleaners leave a sticky film? Yeah, skip those.
Cost Comparison: Budget vs. Luxury
You can find tiles for $1 per square foot at big-box stores, or you can spend $5 per square foot for the fancy designer stuff. IMO, the middle ground is the sweet spot. The dirt-cheap tiles are often thin and have a weirdly shiny finish that screams ‘plastic.’
Spend a little more to get that matte texture and realistic beveling. For a standard 5×8 bathroom, the difference might only be $40. Isn’t your daily happiness worth the price of a few fancy lattes?
Remember to factor in the cost of a good utility knife and some extra tiles for mistakes. I always buy 10% more than I think I need because I’ve definitely ruined a few tiles by miscalculating a toilet curve in the past.

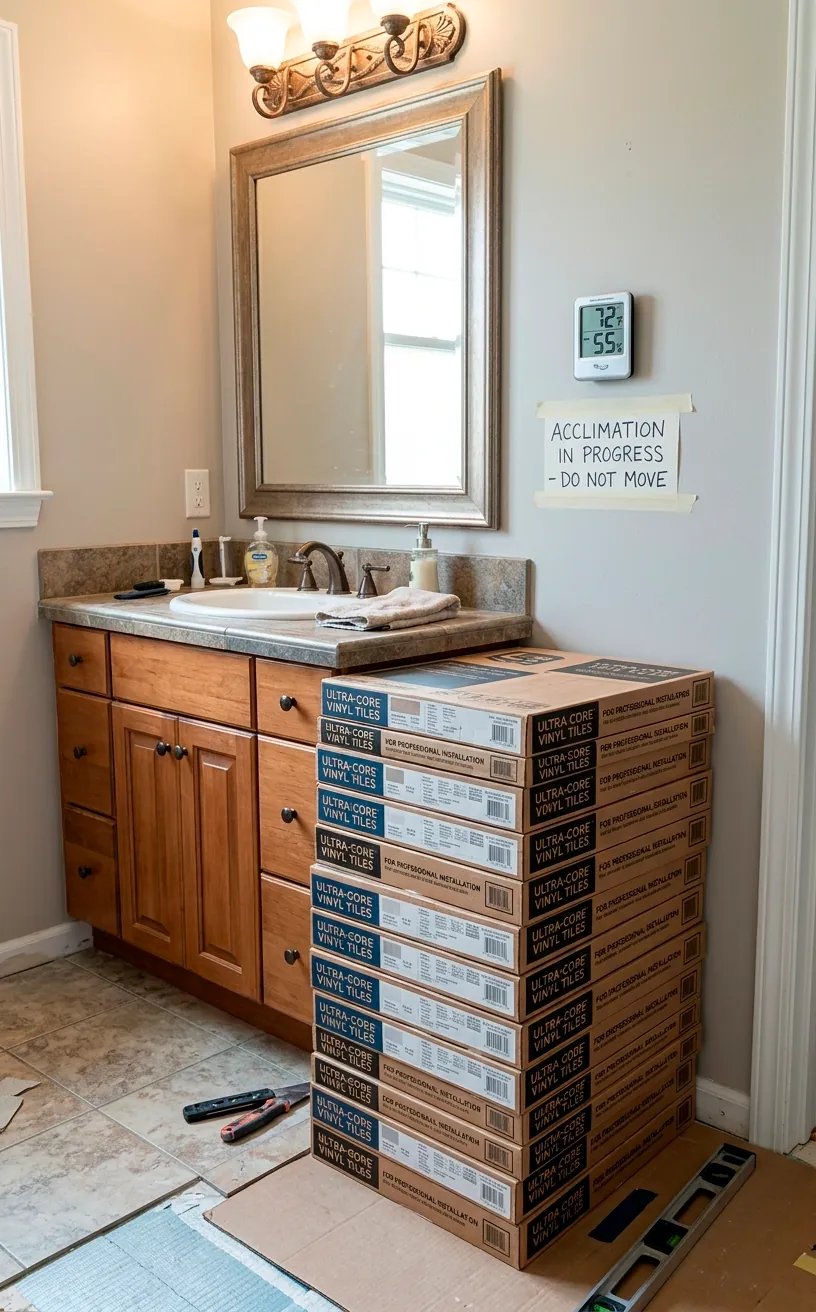
Common Mistakes to Avoid
The biggest mistake? Not letting the tiles acclimate. Vinyl expands and contracts based on temperature. If you bring them in from a cold delivery truck and stick them down immediately, they might shrink and leave gaps later. Let them sit in your bathroom for 48 hours first.
Also, don’t overlap the edges. You want them butt-jointed—flush against each other. If you overlap, you’ll create a trip hazard and a place for dirt to collect. It’s a small detail, but it makes the difference between ‘I did this myself’ and ‘I did this myself and it looks amazing.’
Ready to Floor It?
Transforming your bathroom doesn’t have to be a permanent, expensive nightmare. Removable floor tiles give you the freedom to experiment and the joy of a fresh space without the commitment. So, which pattern are you going to grab first? Honestly, once you start, you’ll probably want to do every room in the house. Let me know in the comments if you’ve got a project planned—I’d love to hear your design ideas!
Related posts
See AllEarthy Terracotta Sunroom Ideas for a Mediterranean Vibe
Transform your space into a sunny European retreat. Discover simple, earthy terracotta sunroom ideas that bring authentic Mediterranean vibes straight …
Read more15 Playful Memphis Style Attic Loft Ideas with Graphic Shapes
Transform your attic loft with playful Memphis style decor! Discover 15 bold ideas using graphic shapes, vibrant colors, and quirky …
Read more15 Custom Built-In Bed Ideas for a Luxury Kids Room
Ready to transform that chaotic playroom into a high-end sanctuary? Discover 15 jaw-dropping built-in bed ideas that blend luxury, smart …
Read moreA Step-by-Step Guide to Total Laundry Room Organization
Transform your chaotic laundry space into an organized, functional oasis with this step-by-step guide. We share smart storage hacks, sorting …
Read more