


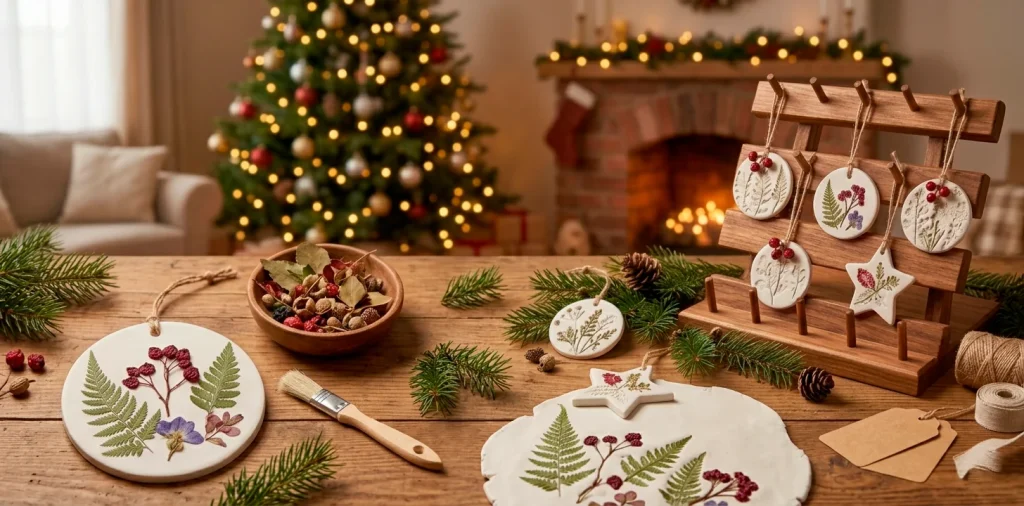

Tired of the same old plastic baubles shattering the second you look at them? I definitely am. This year, we are taking a much better approach with beautiful botanical clay ornaments 🌿. These simple DIY beauties bring actual nature indoors, cost practically nothing, and look ridiculously chic hanging from your branches. Let’s make some magic.
Why Botanical Clay Actually Rocks
Let me be completely honest: I used to buy those expensive, pre-made rustic ornaments that supposedly looked handmade. Then I realized I was paying twenty bucks for what essentially amounts to dirt and water. IMO, the handmade route always wins. Making your own clay decor changes the entire holiday game.
You get complete control over the aesthetic. These custom pieces add a gorgeous, earthy texture to your space that mass-produced plastic simply cannot replicate. Plus, it gives you a totally valid excuse to play with mud again as an adult. Trust me, your tree will thank you for the upgrade.

Gathering Your Earthy Arsenal
Before you start creating a mess in your kitchen, you need the right supplies. I highly recommend air-dry clay because it is incredibly forgiving, though polymer works fine if you prefer baking. Essential DIY tools:
- White air dry clay
- Wooden rolling pin
- Metal cookie cutters
- Twine or velvet ribbon
Grab whatever basic tools you have lying around. Honestly, even an empty wine bottle works perfectly as a makeshift roller if you are in a pinch! You will also want parchment paper to protect your counters.

Foraging the Good Stuff Without Getting Arrested
Now comes the absolute best part: finding your botanical stamps.
Skip the craft store aisles. Mother Nature provides the best textures for free. Step outside and hunt for items with deep, distinct veins or interesting shapes. It is literally a breath of fresh air.
Pine needles, tiny cedar branches, and robust fern leaves leave the most stunning impressions. Avoid anything too thick or fleshy, as it just turns your beautiful craft into a muddy, unrecognizable crater.
I once tried using a thick succulent leaf. FYI, it looked terrible and ruined a perfectly good batch of clay. Stick to flat, detailed foliage for the crispest results!

The Roll and Press Technique
Getting that perfect impression takes a little finesse. You do not want the clay too thin, or it snaps the second you look at it funny.
Roll your material to about a quarter-inch thickness. This is the sweet spot for durability and elegance. Place your chosen leaf on top of the smooth surface, then gently roll over it once with even pressure. Ever wondered why this works so well? The natural moisture in the leaves prevents them from sticking aggressively.
Peel the foliage back slowly to reveal the magic. The level of detail you capture is instantly rewarding. It literally looks like fossilized flora!

Cutting the Perfect Shapes
Once you have your beautiful botanical imprint, it is time to frame it. Standard round cookie cutters are classic, but do not be afraid to experiment with organic, free-form cuts using a craft knife. Sometimes I just use a simple mason jar lid when I cannot find my actual cutters. Just remember to poke a hole at the top before it dries! A simple straw or a wooden skewer works wonders for creating a perfectly sized hole for your hanging string. Forgetting this step is a classic rookie mistake that I have totally made more times than I care to admit. It saves you from a massive headache later on.

Baking vs Air-Drying: The Ultimate Showdown
You generally have two paths here, and both have their merits. Air-drying is undeniably the easiest route. You just set them on a rack and completely ignore them for 48 hours. The choice really comes down to your personal workflow.
However, if you are famously impatient like me, baking polymer clay gets you to the finish line in under an hour. Just watch your oven temperature carefully. Burnt foliage smells exactly as awful as you imagine. Whichever method you choose, make sure they sit completely flat so they do not warp into weird, festive potato chips.

Sanding Off the Rough Edges
Nobody wants a jagged, unfinished ornament scratching up their hands.
Once your pieces are rock solid, grab a fine-grit sandpaper.
Gently smooth the outer edges until they feel buttery and refined. You only need a few light swipes; do not aggressively scrub away the beautiful botanical texture you just worked so hard to create.
This tiny step separates the messy afternoon crafts from the high-end artisan pieces you see in expensive boutiques. It takes maybe three minutes per batch, but the visual payoff is absolutely massive. Dust them off with a soft brush when you finish!

Adding a Splash of Color (Or Not)
Honestly, the raw, white finish of natural clay is stunning on its own. It offers a crisp, minimalist aesthetic that works beautifully with evergreen branches. But if you crave a little drama, painting the impressions is highly encouraged. A sheer wash of metallic gold or sage green watercolor nestled into the stamped crevices highlights the intricate leaf veins brilliantly. I usually leave half of my batch plain and give the rest a subtle antique wash for variety. If you want to match your deeper aesthetic, you can easily explore moody dark academia christmas living room decor for amazing color inspiration.

Sealing the Deal for Next Year
Here is a hard truth: unsealed clay attracts dirt and moisture like a magnet.
If you actually want to keep these beauties around for future holidays, a protective coat is non-negotiable. We want longevity here, folks. I prefer a matte acrylic sealer spray. It preserves that natural, earthy vibe without making them look like glossy plastic discs.
Give them two light coats in a well-ventilated area. This locks in the color, prevents cracking in storage, and ensures your gorgeous DIY efforts survive until next December rolls around.

Stringing It All Together
The hardware you choose completely dictates the final vibe. Cheap string ruins a chic ornament instantly. I swear by frayed velvet ribbon, rich leather cord, or classic jute twine for a grounded, organic feel. It is a tiny detail that completely transforms the look.
Simply thread your chosen material through the pre-made hole and tie a neat little knot. Leaving the tails slightly long adds a whimsical, relaxed charm to the finished piece. For more aesthetic inspiration, you can effortlessly layer pine cedar garlands lush mantel style to display them.

Beyond the Tree: Creative Decor Ideas
Do not restrict these stunners strictly to the pine branches!
Botanical clay pieces are incredibly versatile. I love using them as sophisticated gift tags for wrapped presents. They elevate any setting immediately ✨.
You can write a name on the back with a fine-tip sharpie, and suddenly you have a personalized keepsake. They also look amazing tied around rolled linen napkins for a festive dinner party setting.
String a bunch of them along a piece of twine, and you have instantly created a custom winter garland. The styling possibilities are genuinely endless!

Storing Your Homemade Wonders
Eventually, the holiday magic ends, and you have to pack everything away. Treat these clay ornaments with the respect they deserve! Avoid tossing them into a giant bin where they will inevitably get crushed by heavier decorations. I highly recommend layering them gently between sheets of bubble wrap or soft tissue paper in a sturdy box. Keep them in a temperature-controlled space, as extreme garage freezes can sometimes make air-dry clay brittle. Protect your hard work, and you will get to enjoy these beautifully simplistic creations for many festive seasons to come.

Conclusion
Crafting botanical clay ornaments is genuinely one of the most rewarding holiday projects you can tackle. It is cheap, highly customizable, and leaves you with gorgeous, heirloom-quality decor. Ditch the store-bought plastic this year and bring some authentic nature into your home. Which foliage are you grabbing first? Let me know in the comments!
Related posts
See AllEarthy Terracotta Sunroom Ideas for a Mediterranean Vibe
Transform your space into a sunny European retreat. Discover simple, earthy terracotta sunroom ideas that bring authentic Mediterranean vibes straight …
Read more15 Playful Memphis Style Attic Loft Ideas with Graphic Shapes
Transform your attic loft with playful Memphis style decor! Discover 15 bold ideas using graphic shapes, vibrant colors, and quirky …
Read more15 Custom Built-In Bed Ideas for a Luxury Kids Room
Ready to transform that chaotic playroom into a high-end sanctuary? Discover 15 jaw-dropping built-in bed ideas that blend luxury, smart …
Read moreA Step-by-Step Guide to Total Laundry Room Organization
Transform your chaotic laundry space into an organized, functional oasis with this step-by-step guide. We share smart storage hacks, sorting …
Read more