












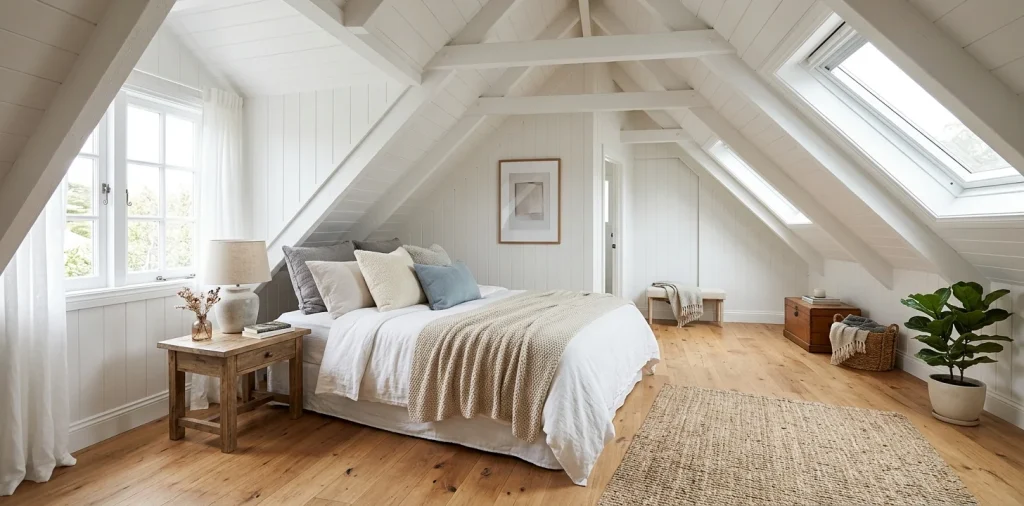

Got a dark, dreary attic that feels more like a creepy cave than a cozy retreat? I know the struggle firsthand, staring at endless orange-toned wood and wondering where the light went. Painting that heavy wood paneling white completely transforms the space. Stick with me, and we will turn that gloomy storage zone into your bright, airy favorite room. Ready? Let’s go!
Assessing Your Current Paneling Situation
First things first, you need to know exactly what kind of wood you face right now.
Real solid wood absorbs paint differently than those flimsy faux-wood laminate sheets from the seventies. You want to scratch an inconspicuous corner to see what happens. Solid wood reveals actual grain underneath, while laminate just flakes off its printed surface. Knowing this crucial detail dictates your entire prep strategy moving forward. And yes, skipping this step usually ends in a peeling, disastrous mess down the road. 🤷♀️ So grab a penny and do the scratch test today!

Gathering Your Paint and Prep Arsenal
You absolutely cannot tackle this massive job with just a rusty brush and blind optimism.
Head to your local hardware store and grab the good stuff. Cheap tools leave bristles all over your beautifully painted walls.
Essential painting gear checklist:
- High-quality synthetic brushes for those tricky edges
- Medium-nap rollers for the textured grooves
- Tack cloths to grab lingering dust
- Heavy-duty drop cloths because accidental spills happen
Trust me, grab a serious stain-blocking primer while you are there. Pine knots bleed through standard paint like hot sauce through a thin paper napkin!

The Gritty Reality of Sanding
Does anyone actually enjoy sanding? I highly doubt it. However, you must scuff up that glossy old clear coat if you want your new paint to stick permanently. You do not need to sand the wood down to bare timber, thank goodness! Just grab some 120-grit sandpaper and give every single board a quick, firm rubdown. You simply want to knock down the shine and create microscopic grooves for the primer to grip tightly. Wear a decent dust mask because fifty-year-old varnish dust tastes exactly as terrible as you imagine. Keep your motions smooth and follow the wood grain to avoid ugly cross-scratches.

Cleaning the Decades of Dust
Attic paneling holds onto unimaginable levels of dust, cobwebs, and mystery grime. It is honestly wild.
After sanding, you must vacuum every square inch of those walls using a soft brush attachment. Once the loose dust vanishes, wipe the panels down with a damp tack cloth or a rag soaked in a heavy-duty degreaser.
A totally clean surface ensures a flawless, bubble-free finish. Ever tried painting over a spiderweb? Spoiler alert: it looks absolutely terrible and ruins the whole vibe. Clean it thoroughly!

Priming Like a Professional
Primer acts as your ultimate secret weapon against stubborn wood tannins. Those pesky yellow and brown stains love ruining a fresh white paint job.
You must use an oil-based primer or a high-quality synthetic shellac primer. Water-based primers simply pull the tannins right up into your topcoat, turning your pristine walls into a blotchy yellow nightmare. Use a brush to work the thick primer deeply into the vertical grooves first. Then, roll over the flat surfaces to smooth everything out perfectly. Keep a window open because oil-based fumes hit harder than your morning espresso! ☕

Caulking the Awkward Gaps
Here is a crucial step most beginners skip entirely. Do not be that person!
Wood panels expand and contract with temperature changes, leaving dark, ugly gaps between the boards over time.
Grab a tube of paintable acrylic latex caulk. Run a tiny bead down those prominent seams and wipe away the excess with a damp finger.
This tiny effort transforms the paneling from “cheap basement chic” to a custom, high-end millwork look. It takes extra time, sure, but the resulting seamless white finish is totally worth the finger cramps. You will thank yourself later. IMO, it makes a huge difference!

Choosing the Perfect White Paint
Not all whites are created equal, my friends. Attic lighting plays wild tricks on your eyes, especially with slanted ceilings and tiny windows. Bright, stark whites often feel clinical and cold in low light. Instead, you want to pick a warm white with subtle creamy undertones. Think soft marshmallow rather than hospital bedsheets! Warm whites bounce light beautifully around those angled attic walls without feeling sterile. Buy a few samples and paint large swatches right over your dried primer. Check them at noon and again at sunset to see how the shadows shift. Finding that perfect warm white finish changes the entire room vibe instantly. If you decide to leave one slanted wall unpainted as a funky accent, check out this guide to floral wallpaper on slanted attic ceilings.

Mastering the Painting Technique
Time for the absolute best part! Watching that crisp white paint cover the dreary wood feels incredibly satisfying.
Start by cutting in around the ceiling, baseboards, and those tricky grooves with your angled brush. Work in small sections, maybe three or four boards at a time. This approach keeps a wet edge and prevents nasty, dried brush marks.
After brushing the grooves, immediately follow up with your medium-nap roller on the flat sections. Roll smoothly in one continuous top-to-bottom motion. Two coats usually provide perfect, opaque coverage. Just let the first coat dry completely before slapping on the second one!

Dealing with Angled Attic Ceilings
Sloped ceilings make painting awkward, messy, and physically exhausting. Your neck will definitely complain tomorrow morning.
Buy a short extension pole for your roller. It gives you the necessary reach without the clunkiness of a full-size broom handle. Roll upwards toward the peak to maintain control against gravity. Paint spatters fall constantly from slanted walls, so wear a hat unless you want trendy white polka dots in your hair! Take frequent breaks to stretch your shoulders. Painting an attic is basically a full-body workout in disguise. 😅 Once the hard work is done and summer hits, you might want to review this essential guide to finished attic summer cooling.

Styling Your Freshly Painted Space
The paint finally dried, the tape is off, and the room looks massive!
White paneling provides a stunning, textured backdrop for almost any decor style. It feels wonderfully coastal, modern, or boho.
Add some warmth back into the space:
- Natural wood accents like oak floating shelves
- Textured woven rugs to ground the floor
- Pops of greenery to breathe life into the tight corners
Bring up your favorite reading chair and a cozy throw blanket. You just built a brilliant little sanctuary from scratch. Enjoy every second of it!

Conclusion
Painting attic wood paneling white completely revamps the entire atmosphere of your home. You tackle the scary prep work, conquer the dark stains with primer, and master the roller technique for a brilliant finish. Your once-spooky storage space now shines as a beautiful, welcoming haven. Which room are you transforming next? Let me know in the comments!
Related posts
See All15 Built-In Shower Niche Ideas That Combine Style and Function
Upgrade your daily wash with these top shower niche designs. Say goodbye to messy floors and hello to a chic, …
Read more10 Glossy Zellige Tile Backsplash Ideas to Add Texture to a Neutral Kitchen
Add instant depth to your neutral kitchen! Discover 10 stunning glossy zellige tile backsplash ideas that introduce rich texture and …
Read more13 Moody and Dark Wedding Details for the Non-Traditional Bride
Tired of traditional pastels? Discover 13 breathtakingly moody and dark wedding details that bring gothic elegance, rich textures, and fierce …
Read moreArchitectural Salvage: Using Old Windows as Entryway Decor
Upgrade your home's first impression with architectural salvage. Learn exactly how to use old windows as stunning, conversation-starting entryway decor.
Read more