












Let’s skip the fluff and get straight to the good stuff. If you want to add that perfectly effortless, earthy vibe to your space, knotting boho macrame feathers and leaves is the ultimate weekend project. I remember my first attempt looked like a sad, matted poodle, but once you nail the technique, it is ridiculously satisfying. Ready to knot?
The Anatomy of a Macrame Feather
So, what exactly makes a macrame leaf look like a leafy dream instead of a frayed mess? You might think it requires some ancient, mystical knotting secret. It all comes down to the spine and the fringe. You build a strong central core using a simple knotting technique, and then you pack on the fringe threads. The beauty of this craft lies in its forgiving nature. If you mess up a knot, you just untie it and try again. Honestly, it is the cheapest therapy you will ever find. Plus, holding that finished, fluffy masterpiece in your hands gives you an unbeatable rush of creative pride.

Choosing the Absolute Best Cord
Let me save you hours of absolute frustration right now. Cord choice dictates your success. Not all cords work for feathers. You absolutely need single-strand cotton cord. If you try to use braided or twisted three-ply cord, you will spend five years trying to brush it out, and you will quickly hate your life. Single-twist cord brushes out like an absolute dream, giving you that incredibly soft, feathery texture we all crave. I usually grab a 3mm or 4mm thickness for standard-sized leaves. If you want a massive statement piece, bump it up to 5mm string. Just remember, thicker cord means fewer knots, but it also means you need a heavy-duty brush to get through it!

Gathering Your Arsenal
You do not need a whole craft store to pull this off, but a few key tools make the process absolutely foolproof. Here is your essential toolkit:
- Single-strand cotton cord
- Fabric scissors
- Pet slicker brush
- Fabric stiffener spray
I learned the hard way that regular paper scissors just chew the cotton cord, leaving jagged edges. Treat yourself to a decent pair of fabric shears immediately. It completely changes the game and gives you those razor-sharp leaf edges that look incredibly professional.

The Square Knot Magic
Ready to get your hands busy? The foundation of every single macrame feather relies on a classic series of square knots. You simply fold a long piece of cord in half to act as your spine. Then, you take shorter pieces, fold them, and interlock them around that center string. It feels a bit like a weird handshake between the cords at first, but your fingers quickly memorize the rhythm. Pull them tight! You want that center spine to be dense and extremely secure. If you leave the knots loose, your leaf will eventually look sad and droopy. We want crisp, perky leaves here, folks.

Shaping Your Masterpiece
Once you stack all your knots tightly, you end up with something that looks like a chunky, messy caterpillar. Now comes the truly magical part. Take your slicker brush and aggressively brush out those strands. Start from the ends and work your way up to the spine. It takes some serious elbow grease, but watching that chunky cord transform into soft, luxurious fluff feels incredibly rewarding. After brushing, you give it a careful haircut to shape it into a perfect leaf or natural feather contour. Trimming takes patience, so take it slow!

The Secret Stiffening Trick
Here is a harsh reality check: gravity is the mortal enemy of a beautifully brushed macrame feather. If you hang it up without stiffening it first, a slight breeze will completely wreck your perfect shape. I swear by a simple commercial fabric stiffening spray. Just lay your brushed, neatly trimmed leaf on some wax paper, saturate it evenly with the spray, and let it dry completely overnight. Flip it over, spray the back, and boom—your beautiful leaf stays absolutely flawless forever. FYI, this simple step separates the amateurs from the pros and ensures your art survives the test of time.

Adding a Pop of Color
Who says you have to stick to plain natural cream? Dyeing your cord opens up a whole new world of bold boho styling. You can dip-dye the ends for a trendy ombre effect or use pre-colored cords right off the spool. IMO, mixing mustard yellow, sage green, and rich terracotta gives the ultimate retro bohemian vibe. If you decide to dye the finished leaf yourself, just remember that the stiffener might react weirdly. Always dye and dry the cord before you shape and stiffen it. Also, wear protective gloves. Unless you want Smurf hands for a week, which is a look, I guess. 😅

Styling Your Boho Beauties
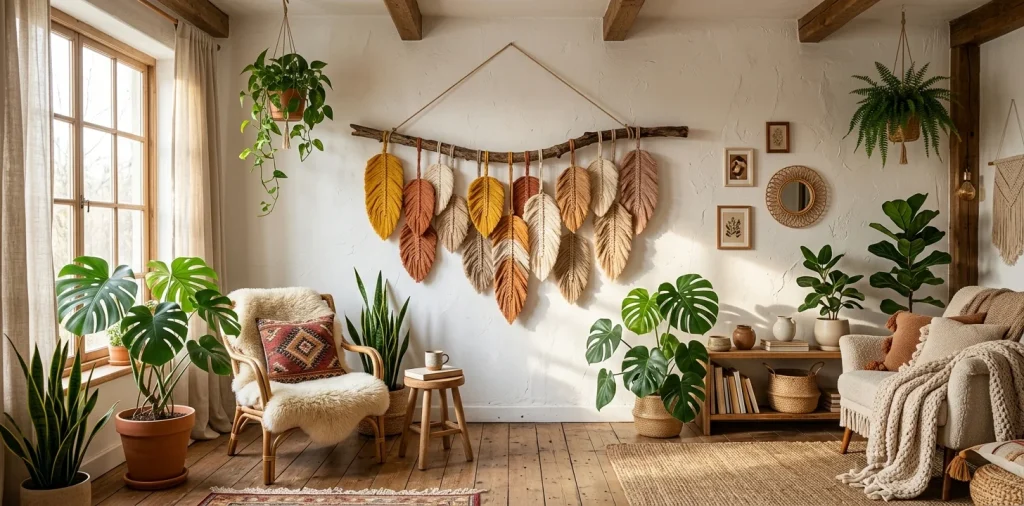
Now that you have a pile of gorgeous feathers, what do you actually do with them? Tie them to a rustic piece of driftwood and hang them above your bed for instant boho chic. You can also attach them to keychains, use them as funky gift wrap accents, or incorporate them seamlessly into much larger wall hangings. They add incredible texture and warmth to literally any room. If you want to expand your fibrous empire and add more greenery, you should definitely check out these 10 chic macrame hanger tutorials.

Troubleshooting the Frizz
Did you brush your cord, and now it just looks like a frizzy cloud of absolute despair? Do not panic. You probably just need to brush it a little more methodically and apply your stiffener while actively combing it flat against the table. Sometimes, trimming the outer edges one more time after the stiffener fully dries gives you that razor-sharp, professional edge. A fine-tooth metal comb works wonders for this final styling phase, helping you align every single fiber perfectly before the spray completely sets. Trust the process, keep combing, and watch the magic happen.

Mixing Textures and Beads
Want to elevate your feather game instantly? Add some wooden beads to the top spine before you tie your final hanging loop. The stark contrast between the smooth natural wood and the fluffy combed cotton adds serious visual interest. You can even thread a few metallic gold beads along the center spine to give the piece a slightly more glamorous, elevated look. This simple accessory addition completely transforms the vibe from basic camp craft to high-end boutique decor. It fits perfectly if you are creating a layered boho reading nook.

Conclusion
Knotting boho macrame feathers and leaves is basically the perfect creative outlet. It is cheap, forgiving, and you end up with gorgeous decor that actually looks intentional. Grab some single-strand cord, a slicker brush, and let your hands do the talking. Which color palette are you grabbing first? Let me know in the comments!
Related posts
See All15 Vintage Circus Inspired Details for Playful Kids Bedroom Decor
Bring the magic of the big top home! Discover 15 playful, vintage circus-inspired decor details that will transform your kid's …
Read moreThe Complete Guide to Styling a Dining Room Credenza for Everyday Elegance
Give your dining room credenza the ultimate glow-up. Discover easy, elegant styling tips that balance everyday function with show-stopping design.
Read more15 Dried Citrus and Cinnamon Garlands for a Naturally Cozy Kitchen
Forget mass-produced decorations. Transform your kitchen into a naturally cozy, aromatic sanctuary with these 15 beautiful dried citrus and cinnamon …
Read moreThe Dog-Friendly Camper: Designing a Van Interior for Your Pets
Transform your camper van into the ultimate dog-friendly adventure mobile! Discover clever interior design hacks, durable materials, and cozy setups …
Read more