











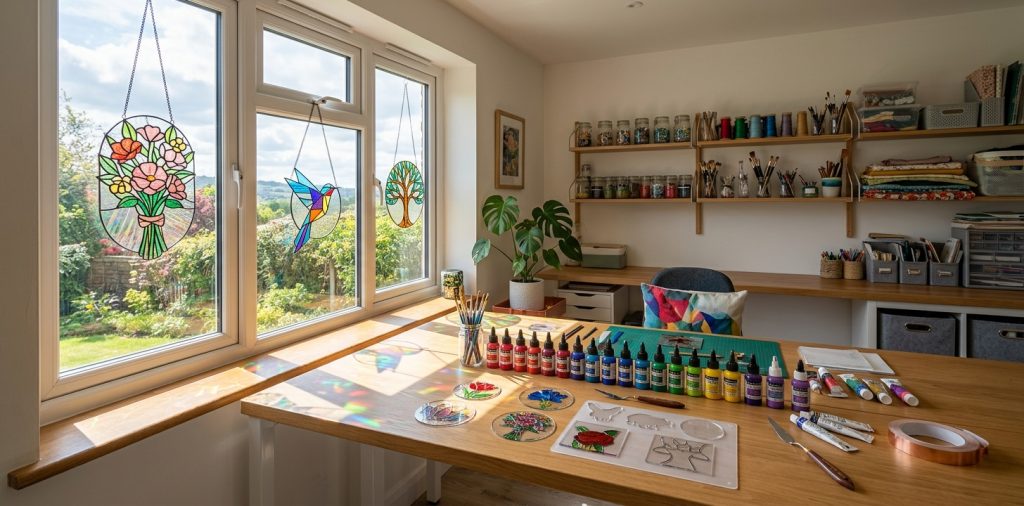

Always admired stained glass but terrified of soldering irons and flying glass shards? Same here. You don’t need a professional artisan studio to create gorgeous, light-catching art for your windows. Painting faux stained glass suncatchers gives you that breathtaking, high-end look using safe, affordable craft supplies. Ready to trick your neighbors into thinking you bought expensive boutique glass?
The Illusion of Expensive Glass Art
Why spend an absolute fortune on authentic stained glass when you can fake it beautifully? Faux stained glass uses specialized gallery-glass paints and liquid leading to mimic traditional leaded windows perfectly. I actually fooled my mother-in-law with a floral piece I whipped up in a single afternoon. She genuinely thought I dropped serious cash on a custom boutique piece.
The secret lies in creating convincing dimensional boundaries and pooling translucent colors just right. You get all the vibrant, glowing color without the bandages from accidental glass cuts. Ever wondered how those cheap plastic craft kits look so real when done correctly? It all comes down to technique and patience.

Gathering Your Suncatcher Arsenal
You cannot start an art project without hoarding the right tools first. Skip the cheap kids’ kits and grab quality supplies for a truly professional finish. I highly recommend gallery-style glass paints because they dry crystal clear and mimic real glass textures beautifully. Want a quick shopping list? Essential supplies you need for faux stained glass:
- Gallery glass paint sets
- Black liquid leading in a squeeze bottle
- Clear acrylic blanks or glass discs
- Wooden toothpicks for popping bubbles
- Paper towels for the inevitable messes

Prepping Your Crafting Zone
Cleanliness matters immensely here. Dust and stray pet hair will ruin a smooth, glassy finish faster than you can blink.
Wipe down your glass or acrylic blank with some rubbing alcohol first. This simple step removes pesky fingerprints and oily residue so your paint actually sticks and cures smoothly.
Next, lay down some wax paper or a silicone craft mat. You will definitely spill something, and scraping dried acrylic off your nice dining table brings absolutely no joy to anyone.
Finally, print out your chosen design and tape it securely underneath your transparent blank. This keeps your paper template perfectly steady while you trace those intricate geometric lines.

Mastering the Liquid Leading
This step separates the amateurs from the pros. You trace your paper template lines using the thick, black liquid leading. This creates the dimensional “metal” borders that hold your wet colors intact later on.
Squeeze the bottle gently and pull it along the glass rather than pushing it. Pushing the nozzle creates jagged, ugly lines. Keep the tip hovering slightly above the surface and let the black line fall naturally into place as you move your hand.
Always connect your lines completely! If you leave tiny gaps, your liquid paint bleeds right through them and ruins your beautiful design. Ever tried to un-mix two wet paint colors? It forms a tragic, muddy nightmare.

Letting the Borders Cure Completely
Patience plays a crucial role right now. You must let your leading dry completely before you even look at the colored paints. If you rush this crucial step, the wet black outline smudges instantly into your vibrant colors, creating a disastrous mess. IMO, waiting requires the absolute most discipline in this craft. The bottle usually recommends eight hours of drying time, but I leave mine overnight just to stay totally safe. While you wait, go wash your hands and start planning your brilliant color palette. Don’t touch those lines until they feel entirely firm and look fully matte!

Flooding the Zones with Color
Now we reach the ridiculously fun part! You literally drop thick pools of colored paint inside your completely dry black borders. Squeeze the color bottle directly into the center of a section, then use the nozzle tip to gently nudge the wet paint right up against the black lines.
Apply the paint generously. Faux stained glass paint shrinks significantly as it dries, so a thin layer looks streaky and terrible. You want a thick, milky puddle of color in every single spot. Don’t panic if it looks totally opaque right now. It magically turns vibrant and beautifully transparent as it fully cures.

The Toothpick Bubble Popping Trick
Air bubbles form the absolute worst enemy of your suncatcher. They emerge instantly when you squeeze the paint bottle too aggressively.
Grab a regular wooden toothpick immediately after you fill a single section. Use the sharp point to pop any visible bubbles floating in the wet paint puddle.
Alternatively, use a sharp sewing pin for those ultra-tiny, stubborn bubbles. You must act fast before the top layer of the wet paint starts forming a solid skin.
If you ignore the bubbles entirely, they dry as ugly little craters in your otherwise flawless masterpiece. A smooth, glass-like finish demands a keen eye and a very quick toothpick.

The Final Test of Your Patience
Now you face another grueling waiting period. You must place your wet suncatcher in a safe, dust-free spot and leave it completely alone for at least twenty-four hours. Seriously, do not touch the wet paint to see if it feels dry. You will ruin it instantly with a giant thumbprint. 🤦♀️ The thick, cloudy paint puddles slowly transform into glowing, jewel-toned transparency right before your eyes. I usually hide mine in a spare guest room so my cat cannot step on it. Give the paint ample time to fully cure, and your patience rewards you with an absolutely stunning piece of window art.

Displaying Your Glowing Masterpiece
Once your suncatcher cures entirely, you get to hang it in your absolute brightest window. Drill a small hole at the top if you used an acrylic blank, or attach a sturdy suction cup hook directly to the back of the glass.
Watch how the morning sun catches the vibrant colors and throws magnificent rainbow patterns across your living room walls. You officially crafted a piece of high-end home decor with just a few squeeze bottles. Find a bright, sunny spot that perfectly highlights your new artistic skills. If you want to maximize the sparkling light in your home, pair your new suncatcher with some gorgeous DIY disco ball hanging planters for an indoor jungle.

Upcycling Extra Paint and Supplies
What happens when you inevitably buy way too much paint? You start upgrading every plain glass object in your entire house.
You can apply these exact same techniques to plain glass vases, boring mason jars, or even small picture frames. I recently transformed an old thrift store lantern into a glowing Moroccan-style centerpiece using just my leftover craft supplies.
Faux stained glass paint actually peels right off smooth surfaces if you make a mistake, making it absolutely perfect for temporary seasonal window clings. You possess a brand new creative superpower now, so go wild and colorize your world.

Tackling Intricate Mandala Designs
Once you conquer basic floral shapes, you naturally want to push your artistic limits. Intricate mandala designs offer an incredible challenge for faux stained glass artists. The repetitive, geometric patterns force you to steady your hand and perfect your liquid leading technique flawlessly.
Start with a slightly thicker black outline for the main outer circles, and use a much thinner nozzle for the tiny interior details. Flooding those tiny pockets with color requires serious precision. I highly recommend buying micro-tip paint applicators specifically for this exact purpose. The glowing, kaleidoscopic result absolutely justifies the painstaking physical effort.

Troubleshooting Streaky Paint Finishes
Sometimes you follow all the rules, but your dried suncatcher still looks terribly streaky and uneven. This annoying issue happens when you attempt to physically spread the wet paint with a harsh tool instead of letting it pool naturally. You must fight the urge to “brush” the liquid glass paint. The paint needs self-leveling volume to cure into a perfectly smooth sheet. Simply add more paint drops until the puddle touches the borders completely on its own. If you already ruined a piece, don’t throw it away just yet! You can easily squeeze a second thick coat directly over the dried first coat to fix the messy texture entirely.

Conclusion
Creating faux stained glass suncatchers offers a uniquely satisfying way to brighten up your living space. You get all the dazzling visual drama of authentic glasswork with none of the scary tools, hot solder, or massive expenses. Grab your paints, pick an awesome design, and start creating some gorgeous window magic. Which bold design are you grabbing first? Let me know in the comments!
Related posts
See All15 Vintage Circus Inspired Details for Playful Kids Bedroom Decor
Bring the magic of the big top home! Discover 15 playful, vintage circus-inspired decor details that will transform your kid's …
Read moreThe Complete Guide to Styling a Dining Room Credenza for Everyday Elegance
Give your dining room credenza the ultimate glow-up. Discover easy, elegant styling tips that balance everyday function with show-stopping design.
Read more15 Dried Citrus and Cinnamon Garlands for a Naturally Cozy Kitchen
Forget mass-produced decorations. Transform your kitchen into a naturally cozy, aromatic sanctuary with these 15 beautiful dried citrus and cinnamon …
Read moreThe Dog-Friendly Camper: Designing a Van Interior for Your Pets
Transform your camper van into the ultimate dog-friendly adventure mobile! Discover clever interior design hacks, durable materials, and cozy setups …
Read more