












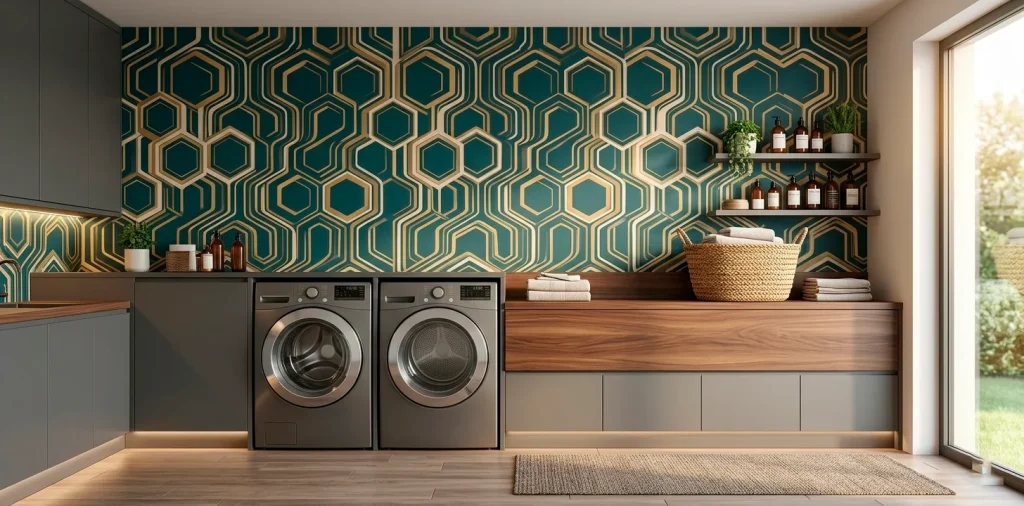

Laundry rooms are basically the splash zones of our homes, right? Between rogue washing machine hoses and steamy dryer vents, the walls take a serious beating. I used to think bare paint was the only survivor here until I discovered moisture-resistant wallpaper. Let’s fix those sad, peeling walls with something that actually lasts and looks incredible.
Why Bother with Specialized Wallpaper?
You might be wondering why standard paper will not cut it.
Well, throwing basic wallpaper into a humid, steamy room is literally a peeling disaster waiting to happen. Moisture-resistant wallpaper uses solid vinyl or coated materials that actively repel water. I learned this the hard way when a bargain floral print practically melted off my wall during a massive weekend laundry marathon. Trust me, you absolutely need that protective barrier if you want the design to survive your washer’s spin cycle. If you are hunting for layout inspiration, I highly recommend checking out these 10 geometric prints modern laundry space ideas.

Decoding the Materials
Not all waterproof claims are equal, FYI. Solid vinyl is the absolute gold standard for laundry spaces. It handles splashes effortlessly and scrubs down like a dream. Vinyl-coated paper is a decent runner-up, but it definitely lacks the hardcore durability of solid vinyl.
Materials to avoid:
- Standard untreated cellulose paper
- Breathable woven fabrics
- Uncoated grasscloth
I personally stick to thick, fabric-backed vinyl because it hides those annoying wall imperfections while fighting off moisture. It makes the installation process surprisingly forgiving, even for beginners.

Prepping Your Splatter Zone
Even the most expensive vinyl will not stick to a damp, dusty mess.
You absolutely must clean those walls thoroughly before applying anything. Grab a heavy-duty degreaser and scrub away years of detergent residue and invisible fabric softener mist. A perfectly smooth, clean surface ensures the adhesive actually bonds.
Applying a mold-resistant primer is my non-negotiable secret weapon. It creates a bulletproof shield against mildew. If you skip this step, you are practically inviting mold to a dark, damp party behind your stunning new design. Do not be that person!

Navigating the Adhesive Jungle
Peel-and-stick or traditional paste?
That is the ultimate debate.
Peel-and-stick is incredibly popular because it feels foolproof. You just rip off the backing and slap it up. However, the high humidity in a laundry room can sometimes melt weak adhesive backings over time.
I generally prefer unpasted vinyl paired with a heavy-duty, moisture-resistant paste. Yes, it gets messy. Yes, you will probably end up with paste in your hair. But that wallpaper will stay locked to the wall until the end of time. It genuinely gives you peace of mind when the dryer is venting maximum steam.

Bold Patterns Hide Everything
Let us talk aesthetics because your utility space deserves some serious drama. Small, busy patterns are absolute lifesavers here. They cleverly disguise rogue water spots, detergent splatters, and even tiny installation mistakes. A massive, sweeping mural might look gorgeous on Instagram, but one mismatched seam ruins the entire illusion. Opt for intricate botanicals or tight geometric shapes to keep the room looking flawless. It tricks the eye beautifully. Plus, injecting a wildly bold print into a tiny room makes doing chores feel slightly less miserable. Well, maybe just a little less miserable! 😅

Tackling the Tricky Spots
Cutting around plumbing lines is nobody’s idea of a good time.
Those awkward gaps behind the washing machine hoses test my patience every single time. The trick is to measure three times and cut small, precise slits for the pipes to slide through. Always leave a little extra overlap near the baseboards to prevent water from seeping underneath the edges.
Smoothing out the air bubbles around utility boxes requires a very sharp utility knife and a sturdy squeegee. Take your time here. Rushing through the obstacle course of a laundry room wall will leave you with jagged edges and massive regrets.

Seam Protection is Vital
Water is sneaky, and your wallpaper seams are its favorite entry point. If moisture penetrates those tiny cracks, the whole sheet starts lifting.
Applying a clear seam sealer over the joints creates a waterproof lock. I just run a tiny bead down the edges and wipe away the excess immediately. It acts like an invisible forcefield. This step takes maybe ten extra minutes but adds years to the lifespan of your design. Seriously, do not skip the seam sealer if you want your hard work to survive the splash zone. It completely stops curling in its tracks.

Maintaining the Magic
So, you survived the installation.
Now you actually have to keep it looking fresh.
The beauty of moisture-resistant vinyl is the incredibly low maintenance. When detergent explodes or dirty water splashes up, grab a damp microfiber cloth and just wipe it away. Avoid abrasive scrubbing pads because they will slowly scratch off the waterproof coating.
I wipe down my laundry walls once a month, and they still look brand new. It really is that simple. You officially have a gorgeous, durable space that laughs in the face of humidity!

The Power of Ventilation
Proper ventilation completely changes the game. Even the strongest waterproof wallpaper needs a fighting chance against constant condensation. If your laundry area lacks a window, seriously consider installing a strong exhaust fan. Moving air prevents moisture from settling on your beautiful newly papered walls. I always leave the door cracked while the dryer runs to let the steam escape. It is a tiny, zero-cost habit that protects your investment and keeps the entire room smelling infinitely better. IMO, good airflow is the ultimate backup plan for any humid space.

Lighting Brings It to Life
Lighting completely alters how your new wallpaper looks.
Laundry rooms are notoriously dark and gloomy. If you chose a moody, dark vinyl pattern, you absolutely need to upgrade those harsh overhead bulbs. Swapping out cold, sterile lighting for warm LED fixtures brings the wallpaper design to life.
Under-cabinet lighting is another brilliant trick. It highlights the texture of the moisture-resistant coating while giving you essential task lighting for stain removal. You will finally be able to see what you are doing while admiring those flawless seams.

Conclusion
Upgrading your splash zone does not have to be a recurring nightmare. By choosing a heavy-duty, moisture-resistant vinyl and taking the boring prep work seriously, you can completely transform a dreary utility room into a stylish sanctuary. Which bold pattern are you grabbing first for your next weekend project? Let me know in the comments!
Related posts
See All15 Vintage Circus Inspired Details for Playful Kids Bedroom Decor
Bring the magic of the big top home! Discover 15 playful, vintage circus-inspired decor details that will transform your kid's …
Read moreThe Complete Guide to Styling a Dining Room Credenza for Everyday Elegance
Give your dining room credenza the ultimate glow-up. Discover easy, elegant styling tips that balance everyday function with show-stopping design.
Read more15 Dried Citrus and Cinnamon Garlands for a Naturally Cozy Kitchen
Forget mass-produced decorations. Transform your kitchen into a naturally cozy, aromatic sanctuary with these 15 beautiful dried citrus and cinnamon …
Read moreThe Dog-Friendly Camper: Designing a Van Interior for Your Pets
Transform your camper van into the ultimate dog-friendly adventure mobile! Discover clever interior design hacks, durable materials, and cozy setups …
Read more