


You finally decided to stop hauling buckets of water across the lawn for your thirsty hydrangeas, didn’t you? Smart move. Planning your outdoor plumbing turns a chaotic backyard into a functional paradise, but if you wing it, you’ll end up with a swamp instead of a sanctuary. I’ve seen enough ‘DIY disasters’ to know that a solid plan is the only thing standing between you and a very expensive call to a grumpy plumber on a Sunday morning. Let’s get your pipes in order so you can spend more time grilling and less time digging.
Mastering the Blueprint of Your Terrain
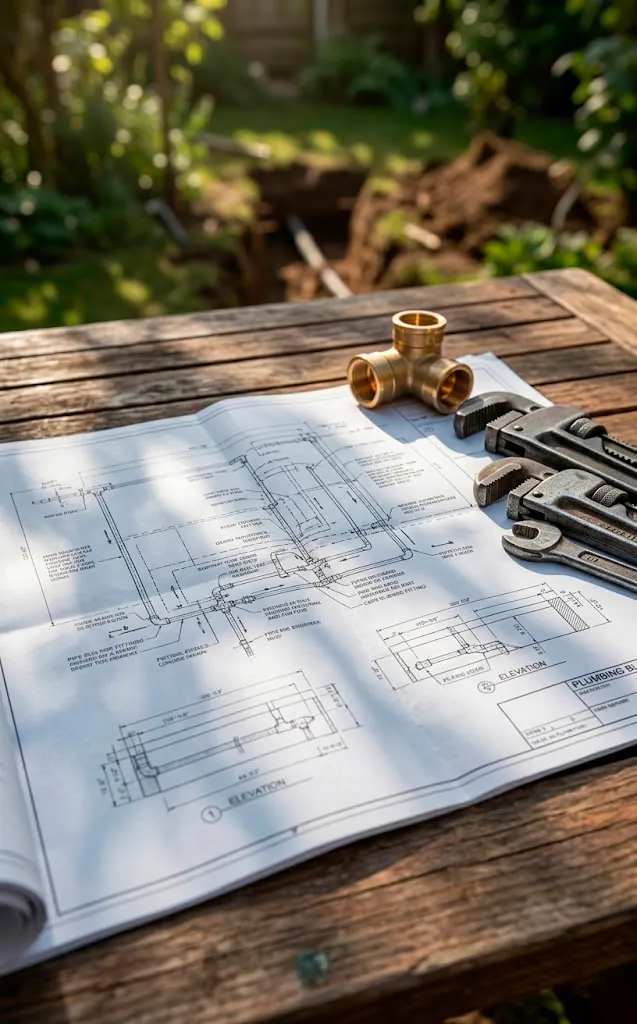
Before you grab a shovel and start reenacting a gold rush scene, you need a map. Where exactly do you want the water to go? I always start by sketching the entire yard to visualize the run from the main house line to the furthest faucet. This isn’t just about convenience; it’s about math. Have you considered the natural slope of your land? If you ignore the grade, you might find your drainage backing up faster than a city sewer in a monsoon.
I prefer to keep lines as straight as possible to minimize friction and material costs. Every elbow joint you add creates a tiny bit of pressure drop, and nobody wants a shower that feels like a leaky teapot. FYI, mapping your existing underground utilities is the most important step here unless you enjoy the thrill of accidentally cutting your internet cable mid-binge-watch. 🛠️
Navigating the Legal Red Tape
I know, talking about permits is about as exciting as watching paint dry, but the city inspector doesn’t share your sense of adventure. Most regions require you to pull a permit for any permanent plumbing extensions. Why? Because they want to ensure you aren’t accidentally siphoning greywater into the local creek or cross-contaminating the potable supply. I recommend checking your local codes before you buy a single foot of pipe. A little research now prevents a massive ‘tear-it-all-out’ order later when you try to sell your house. Trust me, the ‘I didn’t know’ excuse works exactly zero percent of the time with code enforcement officers.
Winterization and the Art of Not Bursting
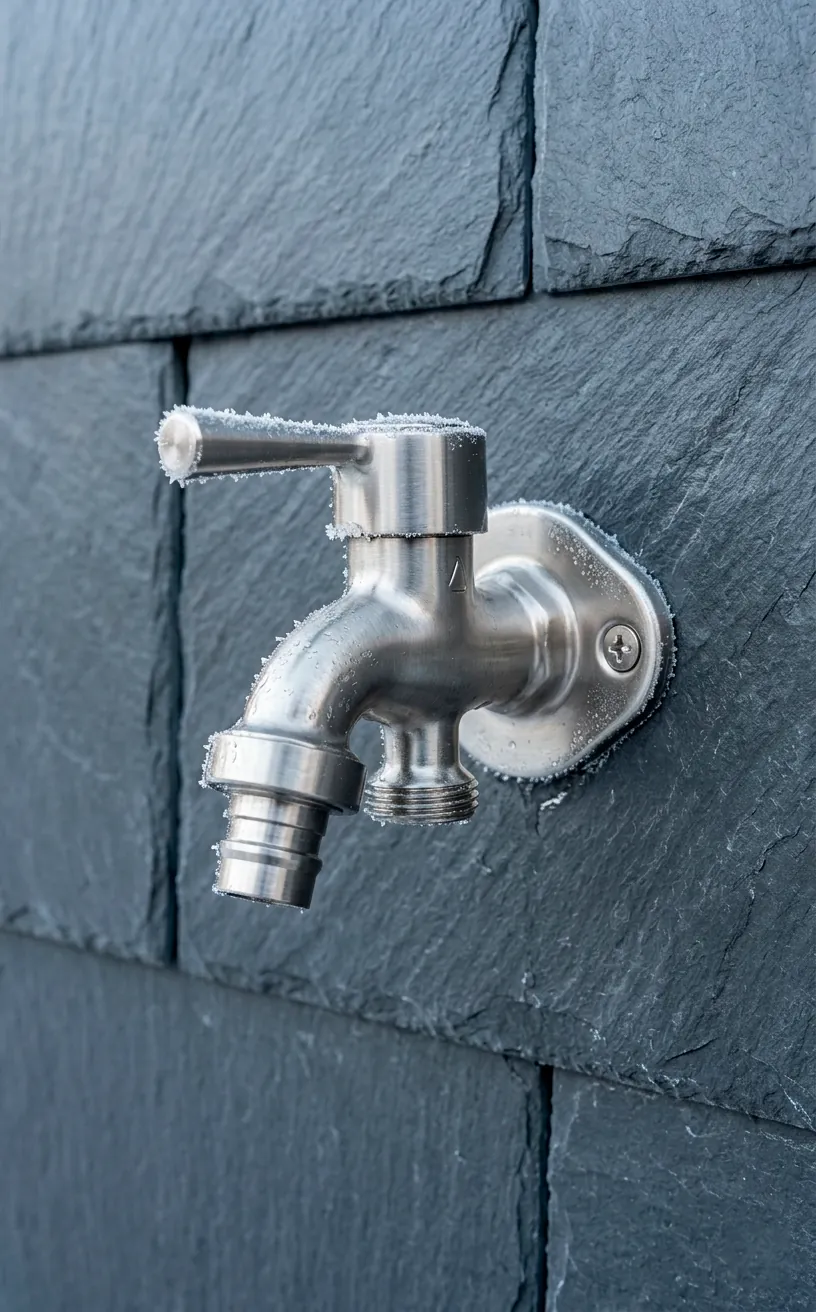
Frozen pipes are the ultimate mood killer. If you live anywhere that sees a snowflake, you must plan for the deep freeze. Have you thought about how you’ll drain the system? I always install a slope in the pipes leading back to a low-point drain valve.
This simple setup lets gravity do the heavy lifting when November rolls around. You just shut the main valve and open the drain.
### Essential Winter Gear:
- Frost-proof hose bibs
- Insulated faucet covers
- Compression-style drain valves
I also suggest using heat tape for any shallow lines that can’t go below the frost line. If you skip this, you’ll literally hear your pipes screaming in February. It’s a sad, wet sound that usually results in a very soggy basement. IMO, spending an extra fifty bucks on frost-proof fixtures is the best insurance policy you can buy for your backyard.
Choosing Your Pipe Material Wisely
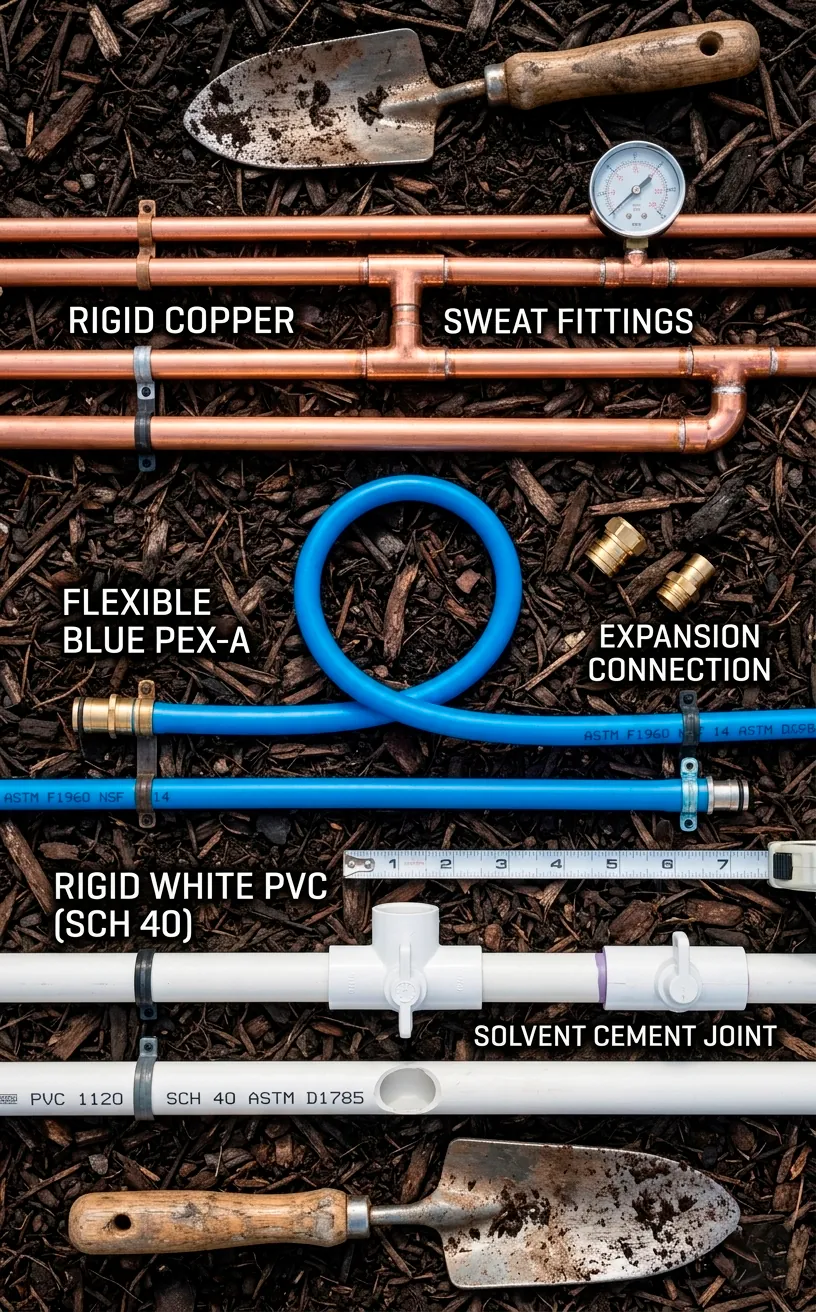
In the battle of PVC versus PEX versus Copper, there is no single winner, only the right choice for your specific vibe. I usually lean toward PEX for underground runs because it’s flexible and handles freeze-thaw cycles better than rigid PVC. However, if you want that high-end ‘industrial chic’ look for an exposed outdoor shower, copper is the king. Just be prepared to sweat the joints—and pay the copper tax at the hardware store. PVC remains the budget-friendly go-to for irrigation, but keep it buried deep to protect it from UV rays that make it brittle enough to snap like a dry twig.
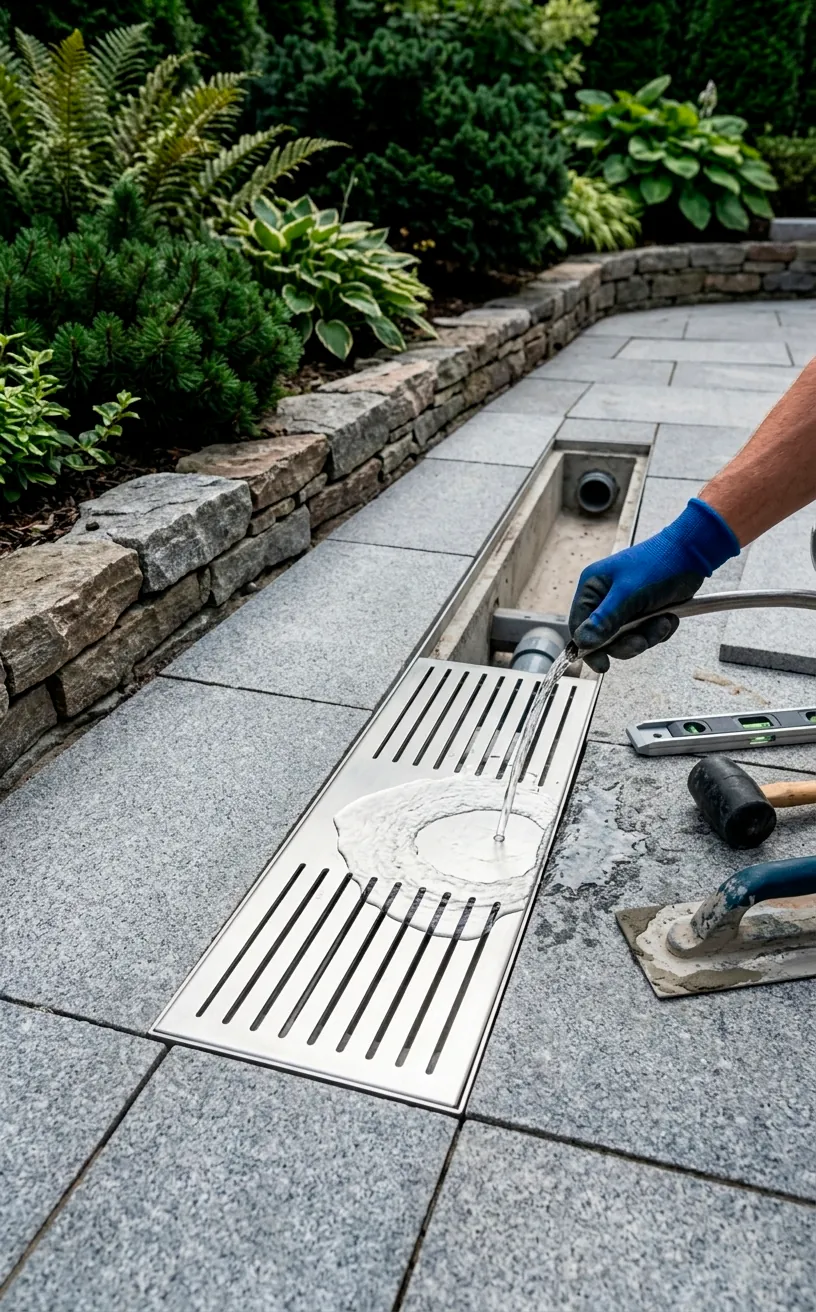
The Drainage Dilemma
Where does all that water go after you wash the BBQ grease off your hands? You can’t just let it pool near the foundation unless you’re aiming to grow a private moat. I suggest installing a French drain or a dedicated dry well if you aren’t tying back into the main house sewer.
A dry well is basically a big hole filled with gravel that lets water seep back into the earth slowly. It’s eco-friendly and keeps your patio from becoming a skating rink in the winter.
Ever thought about how a pond might affect your layout? If you’re building near a deck, you can even integrate an elevated koi pond into your water management plan for a truly high-end look.
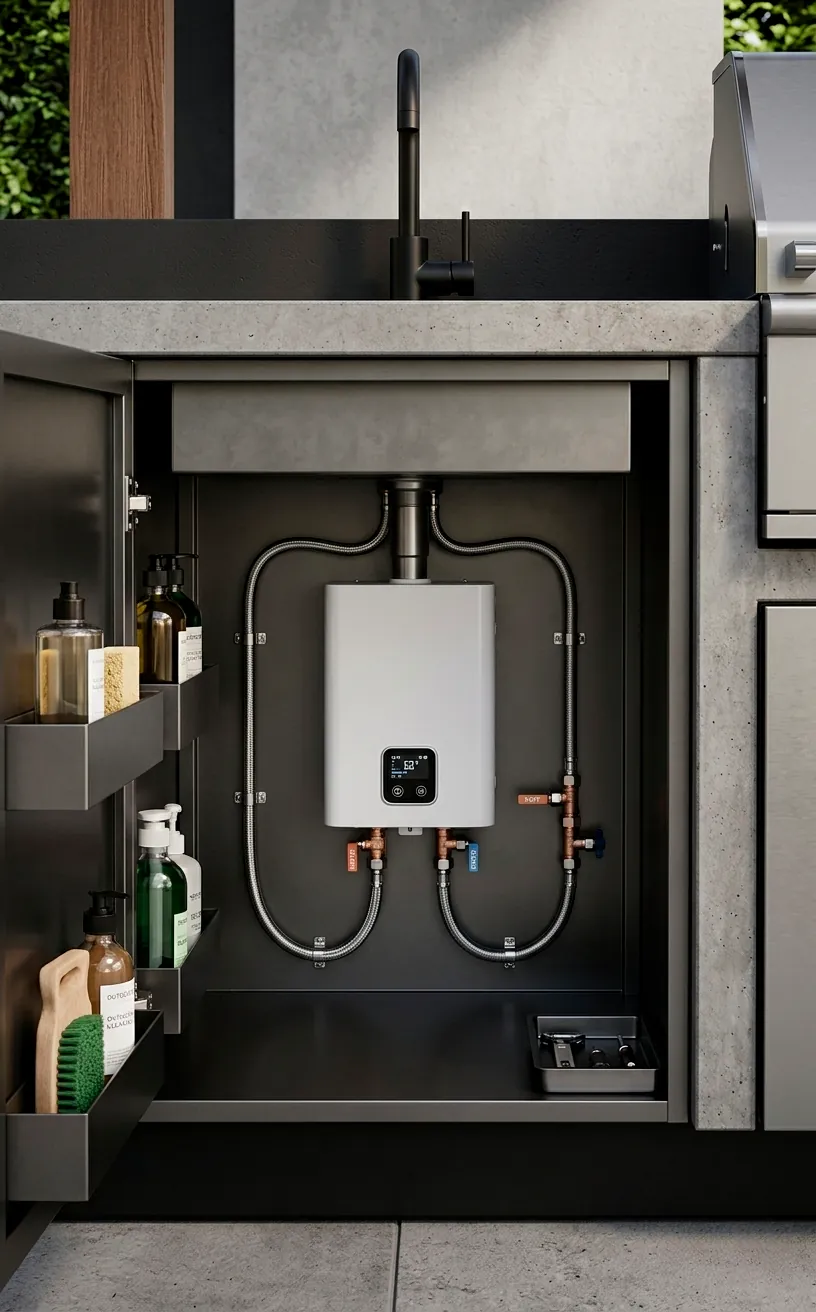
Kitchen Dreams and Hot Water Reality
If you’re building an outdoor kitchen, don’t forget the hot water. I know, a cold-water-only sink sounds fine until you’re trying to scrub hamburger grease off a porcelain plate in 60-degree weather. I recommend a small point-of-use electric tankless water heater hidden right under the sink.
These little boxes are magic; they give you instant hot water without needing to run a dedicated hot line from the house. You’ll thank me later when your hands aren’t numb from doing the dishes outside.
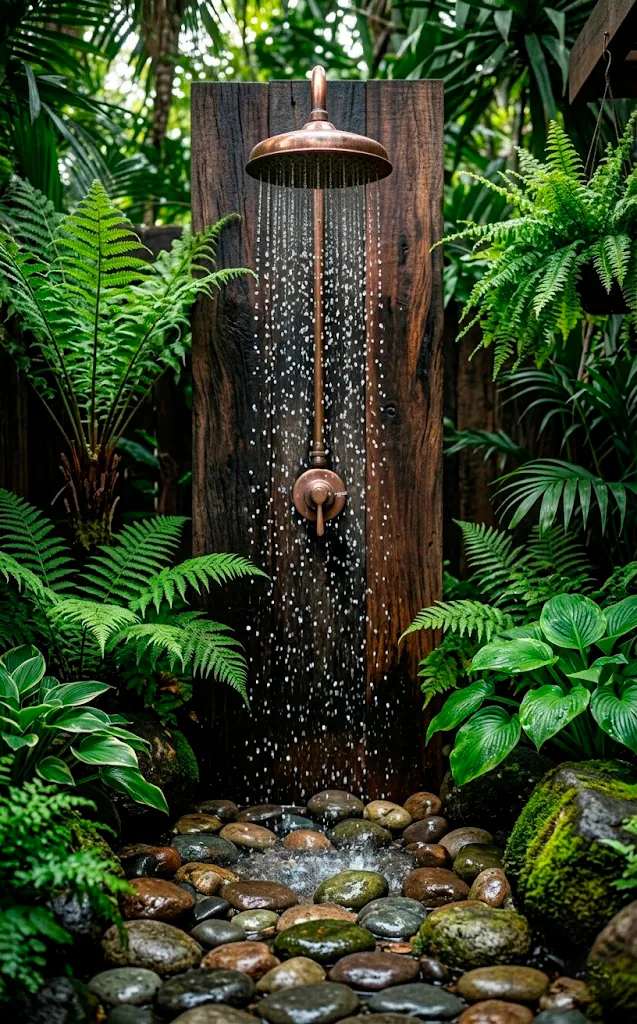
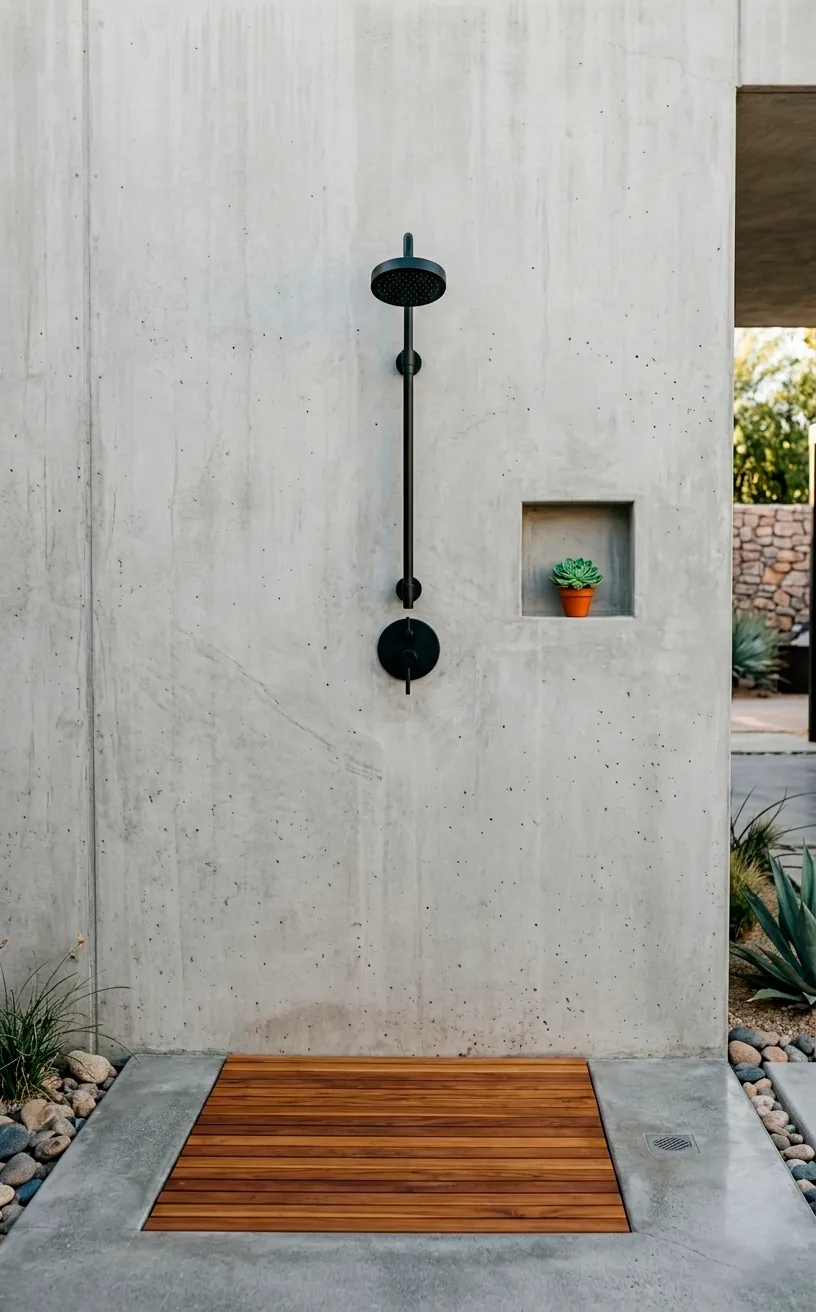
The Luxury of an Outdoor Shower
An outdoor shower is the ultimate flex for a backyard enthusiast. But beyond the aesthetics, you have to think about privacy and floor durability. I love using teak slats for the floor because they feel great on the feet and handle moisture like a champ. For the plumbing, ensure you use a pressure-balancing valve. Why? Because you don’t want a sudden drop in house pressure to turn your relaxing rinse into a scalding nightmare. Keep the valves accessible behind a removable panel so you can service them without smashing your beautiful masonry.
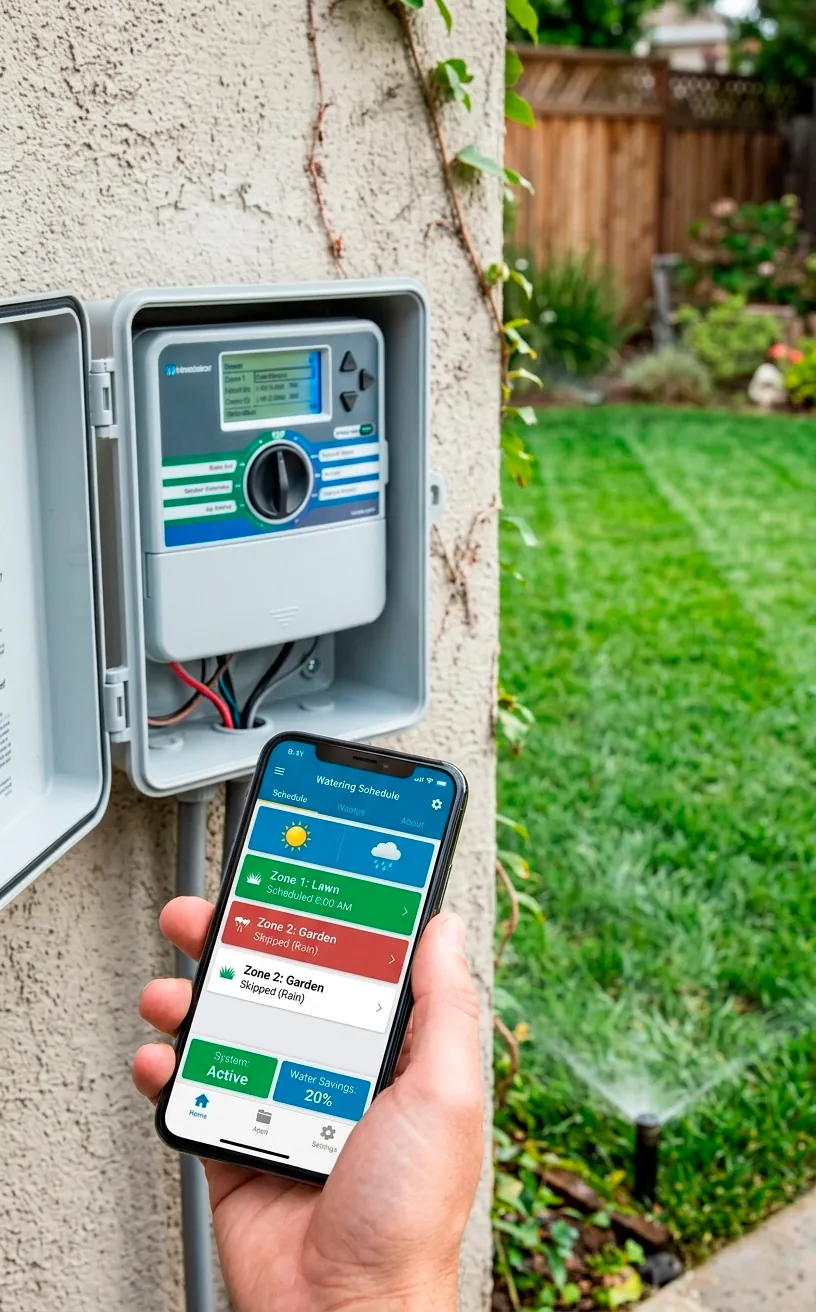
Smart Irrigation: Set It and Forget It
Why are you still standing there with a hose like it’s 1955? Smart irrigation controllers are so cheap now that there’s no excuse for manual watering. I love controllers that sync with local weather data.
If the forecast says it’s going to rain, the system skips the cycle. It saves water and keeps your lawn from drowning.
### Irrigation Must-Haves:
- WiFi-enabled controller
- Drip emitters for flower beds
- Rotary nozzles for the lawn
- Rain sensors for backup
You should divide your yard into zones based on sun exposure. I put my shady ferns on one circuit and the sun-scorched grass on another. This targeted approach keeps everything green without wasting a drop. Honestly, watching your sprinklers pop up automatically while you sip a cold drink is one of life’s greatest small joys.
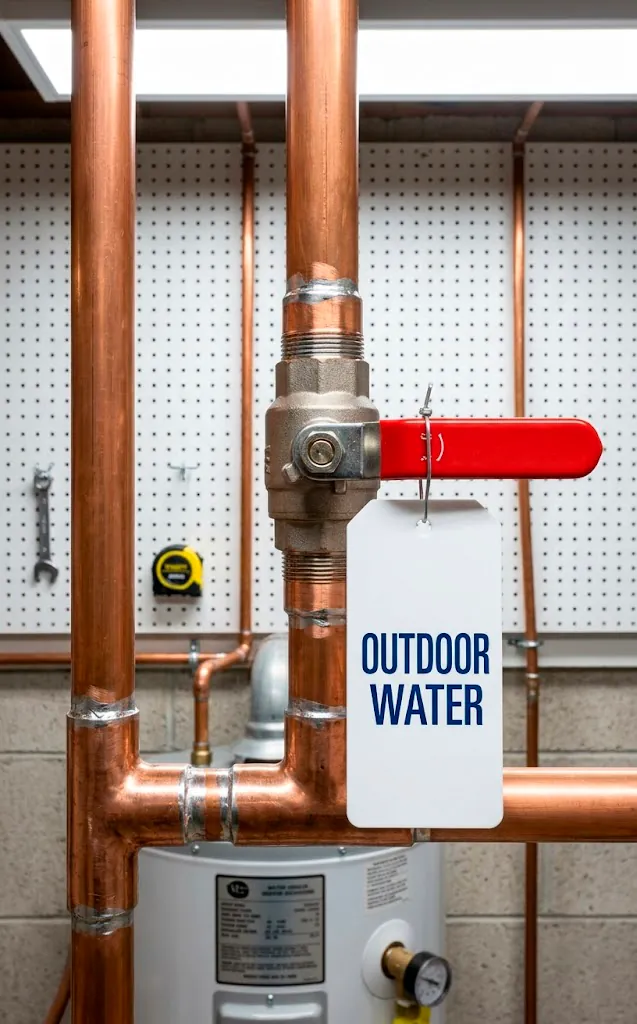
The Location of the Main Shut-off
Every outdoor system needs its own dedicated shut-off valve inside the house. I cannot stress this enough. If an outdoor pipe bursts while you’re at work, you don’t want to shut off the water to the whole house—including your toilets—just to stop the leak.
I install my secondary shut-offs in a basement or utility room that’s easy to reach. Label them clearly with a bright tag so even a guest could find them in an emergency. It’s the difference between a minor annoyance and a total catastrophe.
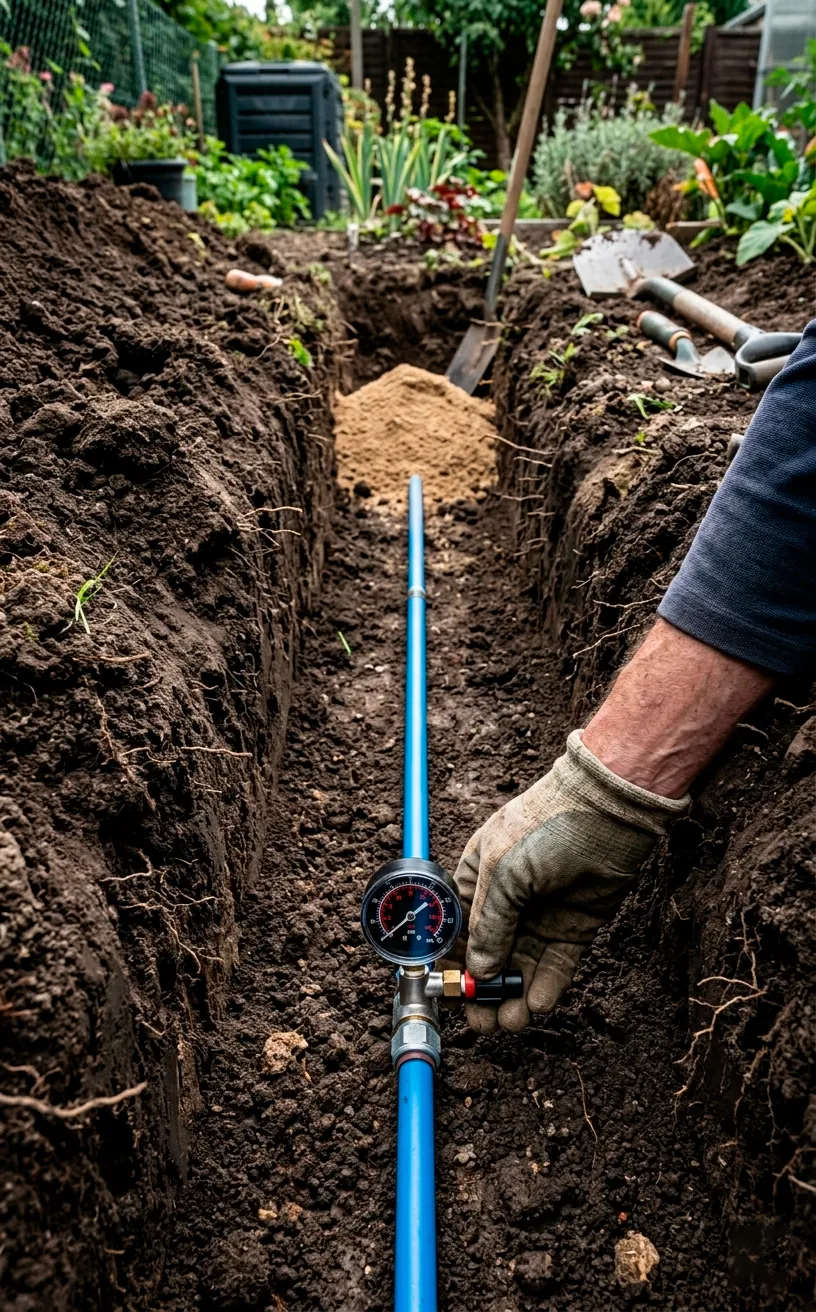
Testing and Ongoing Maintenance
Once you finish the installation, do not bury those pipes immediately. I turn the water on and leave the trenches open for at least twenty-four hours. You’ll find that a tiny drip today becomes a huge sinkhole tomorrow. Check every single joint with a dry paper towel to spot slow leaks that the eye might miss.
Once you’re sure it’s airtight (or watertight, technically), backfill with care. Don’t throw giant rocks directly onto your new pipes. I use a layer of sand first to provide a cushion against the weight of the dirt.
Keep a simple log of where your pipes are buried so you don’t accidentally pierce them later during a landscaping frenzy. For more ways to make your backyard pop, check out these cozy outdoor living ideas to compliment your new plumbing.
Final Thoughts on Your Watery Oasis
Planning your outdoor plumbing isn’t exactly rocket science, but it does require a bit of foresight and a lot of patience. If you map your lines, choose the right materials, and plan for the winter, you’ll have a system that lasts for decades. Are you ready to start digging, or are you still terrified of the permit office? Trust your gut, follow the code, and keep those pipes deep. Let me know in the comments if you hit any buried treasure while digging—or more likely, just a very confused earthworm!
Related posts
See AllThe Complete Screened In Porch Planning Guide: Comfort Meets Style
Ready to transform that bug-infested patio into your favorite room? Discover how to plan a screened-in porch that perfectly balances …
Read more20 Low-Maintenance Small Balcony Design Ideas: Perfect for Busy Lifestyles
Transform your tiny outdoor space into a lush retreat without adding more chores to your weekend. Discover 20 low-maintenance small …
Read moreHow to Achieve a High-End Mediterranean Patio Look on a Budget
Want to turn your basic backyard into a dreamy European oasis without emptying your wallet? Discover budget-friendly tricks for creating …
Read more10 Sophisticated Small Pond Ideas to Elevate Your Entrance
Upgrade your home's curb appeal with these 10 sophisticated small pond ideas. From minimalist concrete bowls to zen-inspired water features, …
Read more