


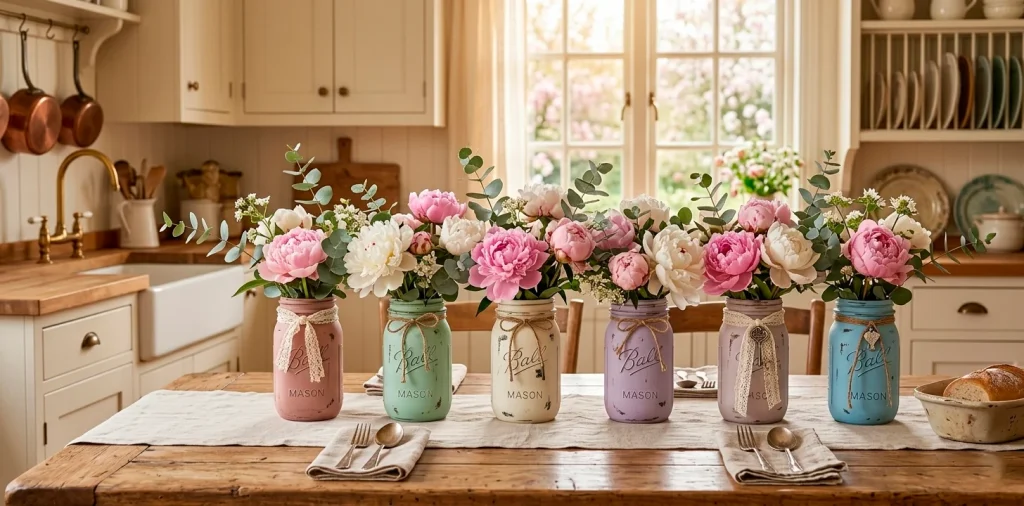

Listen, we’ve all got that one cabinet overflowing with old pasta sauce jars and pickle containers. Why do we keep them? Hope, mostly. But Mother’s Day is creeping up, and those glass hoardings are finally going to pay off big time. Instead of dropping fifty bucks on a generic vase, I’m going to show you how to create a high-end vintage masterpiece for practically zero dollars. Mom loves a handmade touch, and frankly, so does your bank account. Let’s turn that trash into a floral treasure that looks like it stepped straight out of a boutique in Provence! 🌸
The Great Glass Scavenger Hunt
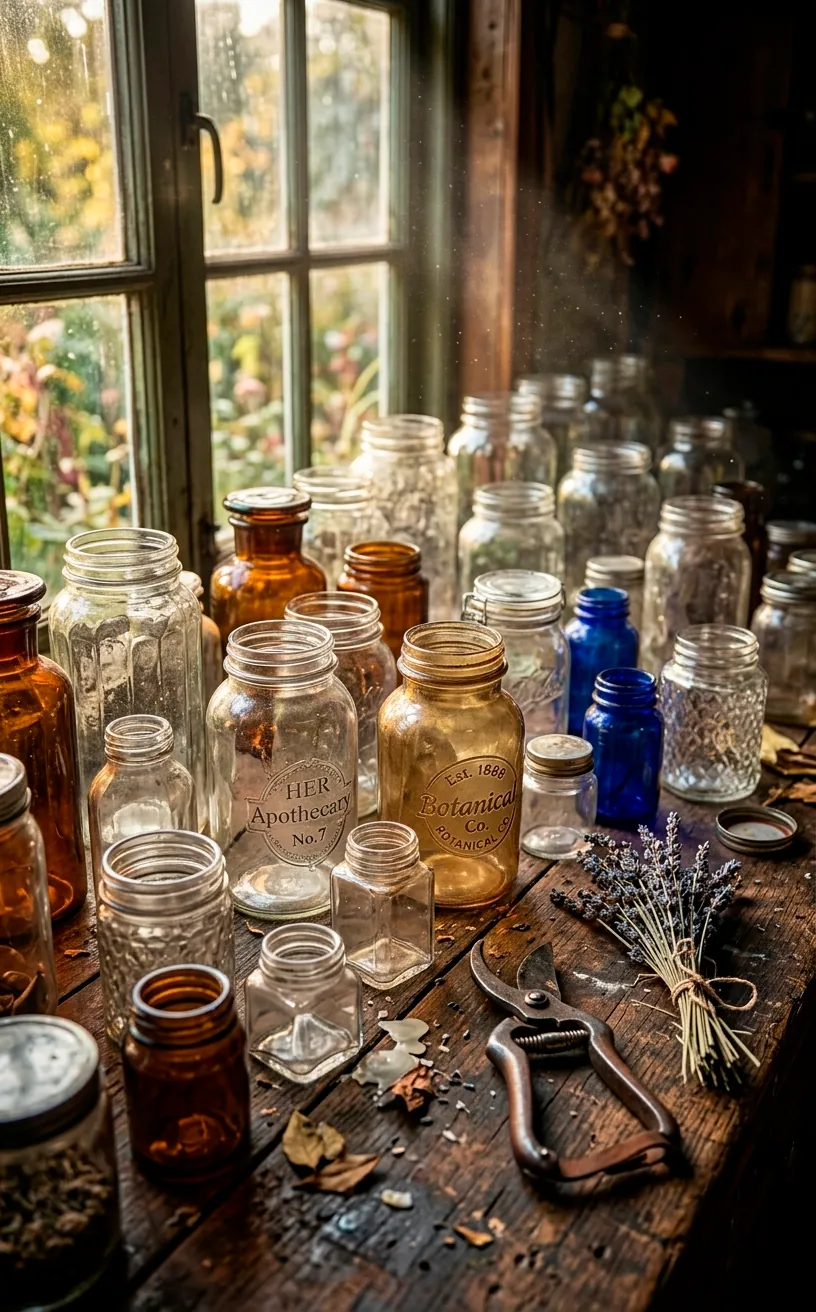
Before we start getting messy, you need the perfect canvas. Check your recycling bin or that dark corner under the sink where the spiders live. I always look for jars with unique shapes or interesting raised lettering because they catch the paint beautifully. Who knew an old artichoke hearts jar could look so sophisticated? IMO, the weirder the shape, the better the final result looks on a mantle.
Don’t just settle for standard mason jars, although those work in a pinch. Varying the heights and widths creates a dynamic display that feels curated rather than accidental. Have you checked the thrift store lately? They usually practically give away odd glassware for pennies. Just make sure the glass isn’t cracked; we want vintage vibes, not a soggy table and a disappointed mother. lol.
Breaking Up with Sticky Labels
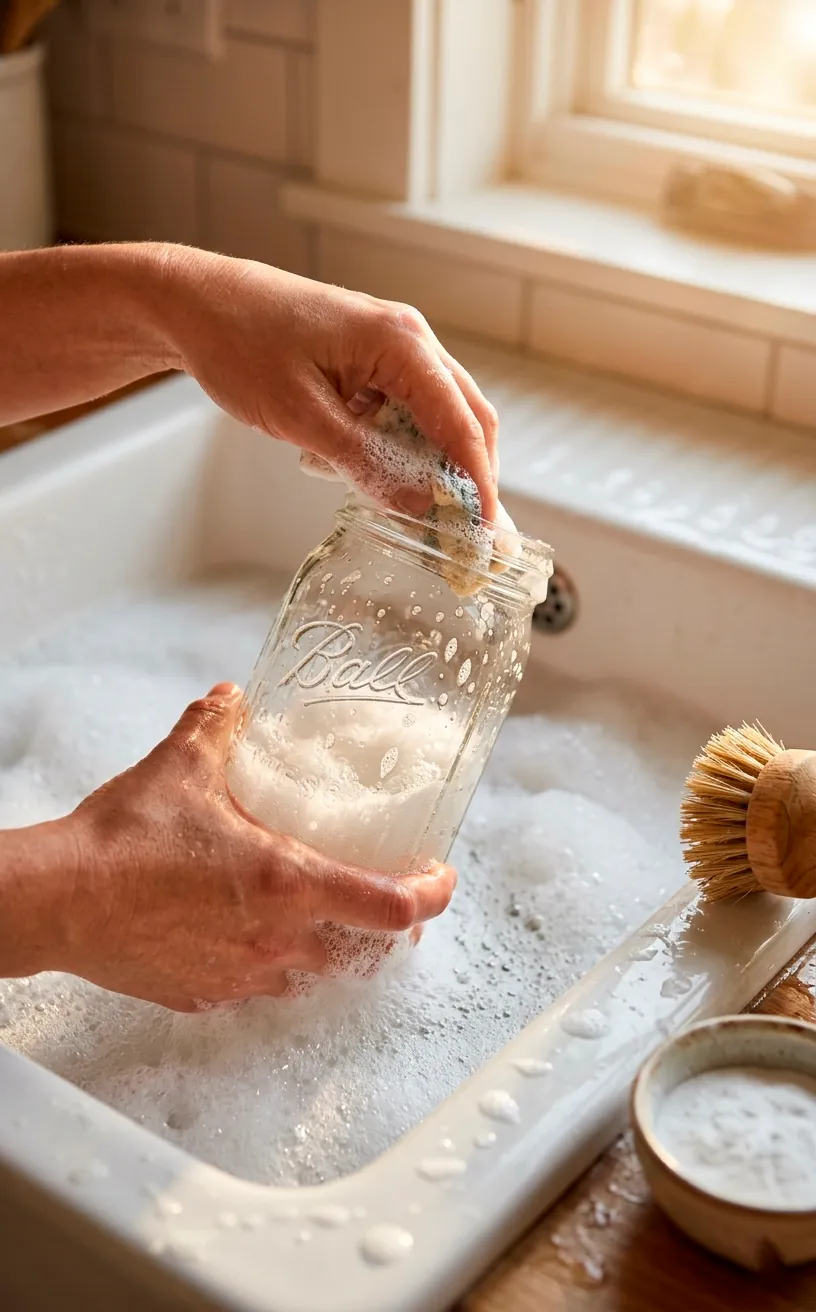
Removing labels is the absolute worst part of this project, hands down. I’ve spent way too many hours picking at stubborn adhesive with my fingernails until I finally learned my lesson. A soak in hot, soapy water usually does the trick for the easy ones, but for those indestructible industrial glues, you’ll need a secret weapon. I swear by a mix of baking soda and vegetable oil to dissolve the gunk without using harsh chemicals. Seriously, why do companies use glue that could survive a nuclear winter? Just slather the paste on, let it sit for ten minutes, and watch the sticky mess slide right off like it was never there. ✨
The Magic of Distressed Chalk Paint
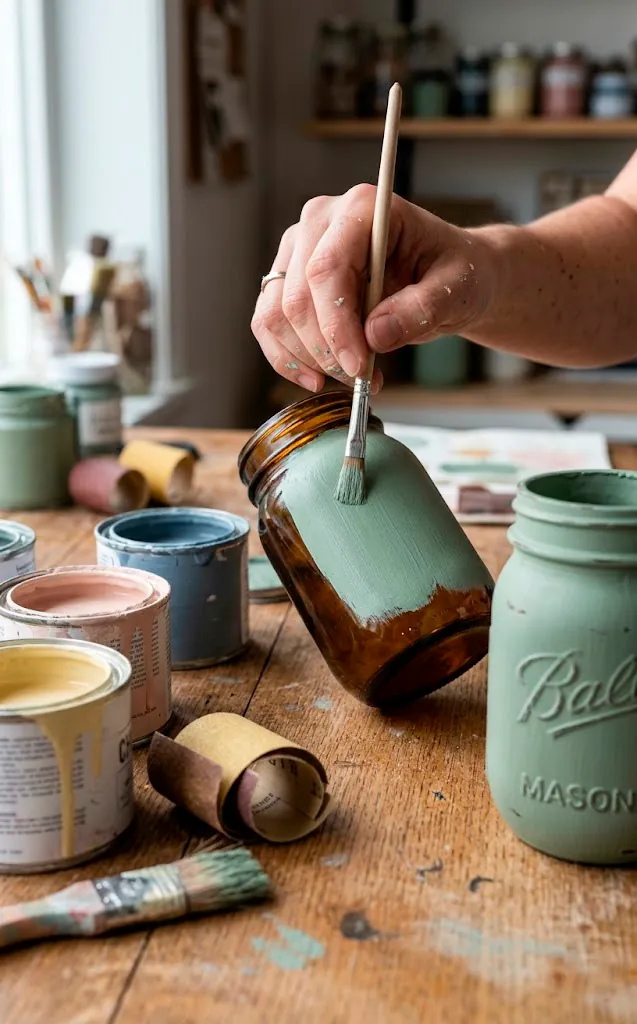
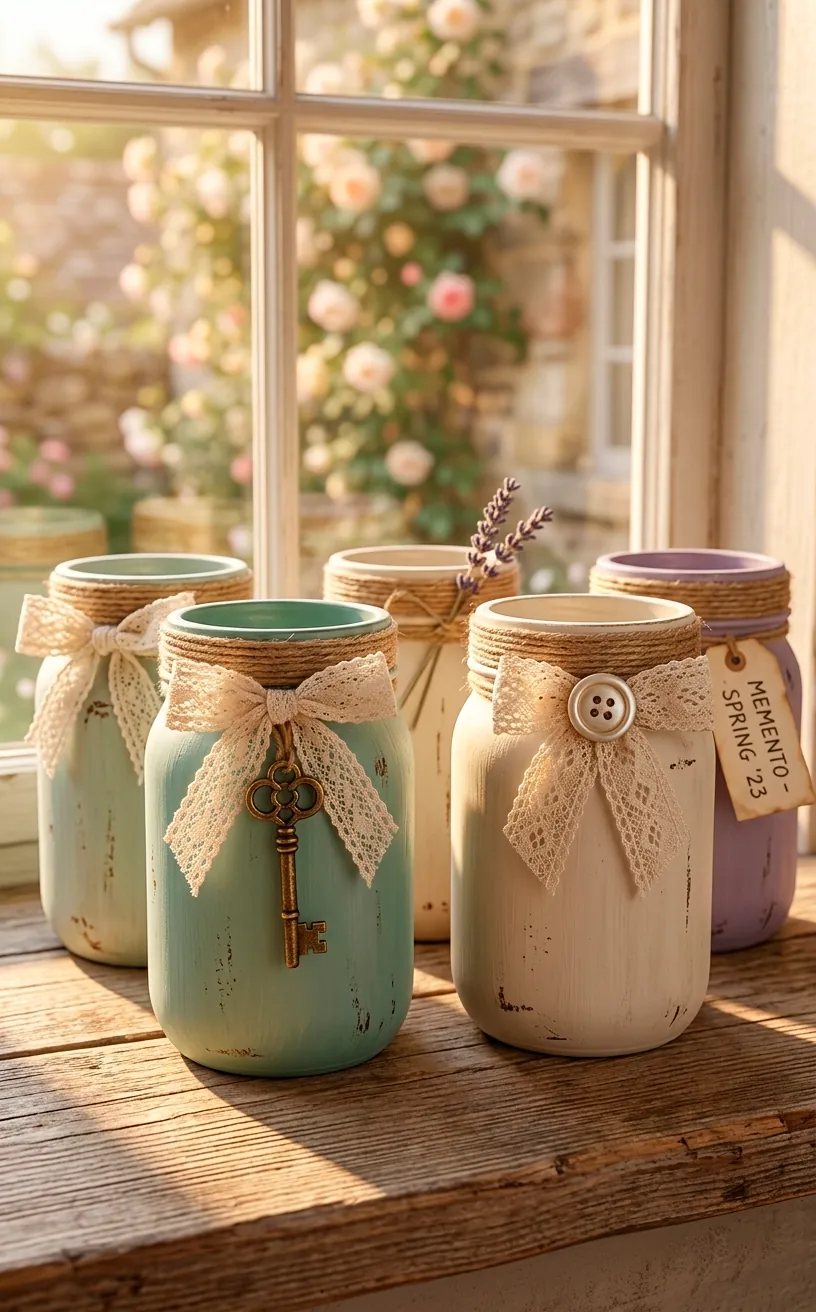
Now for the fun part! Chalk paint is the holy grail of the vintage look because it sticks to glass without a primer. I usually apply two thin coats in soft tones like sage green, dusty rose, or antique white.
Don’t worry about making it perfect. In fact, a few visible brush strokes add to the charm. Ever seen a perfectly smooth vintage item? Me neither.
Once the paint dries, grab a piece of fine-grit sandpaper. Lightly sand the raised edges, the rim, and any embossed lettering to let the glass peek through. This instantly gives the jar a ‘found in a French attic’ personality.
I love how this technique transforms a basic grocery store jar into something that looks like a pricey heirloom. Be sure to wipe away the dust before you move on to the next step, or your final finish will look like a literal sandbox.
If you want more inspiration for your creative space, check out this guide on cottagecore bliss floral home office styles.
Decoupage: Adding Floral Flair
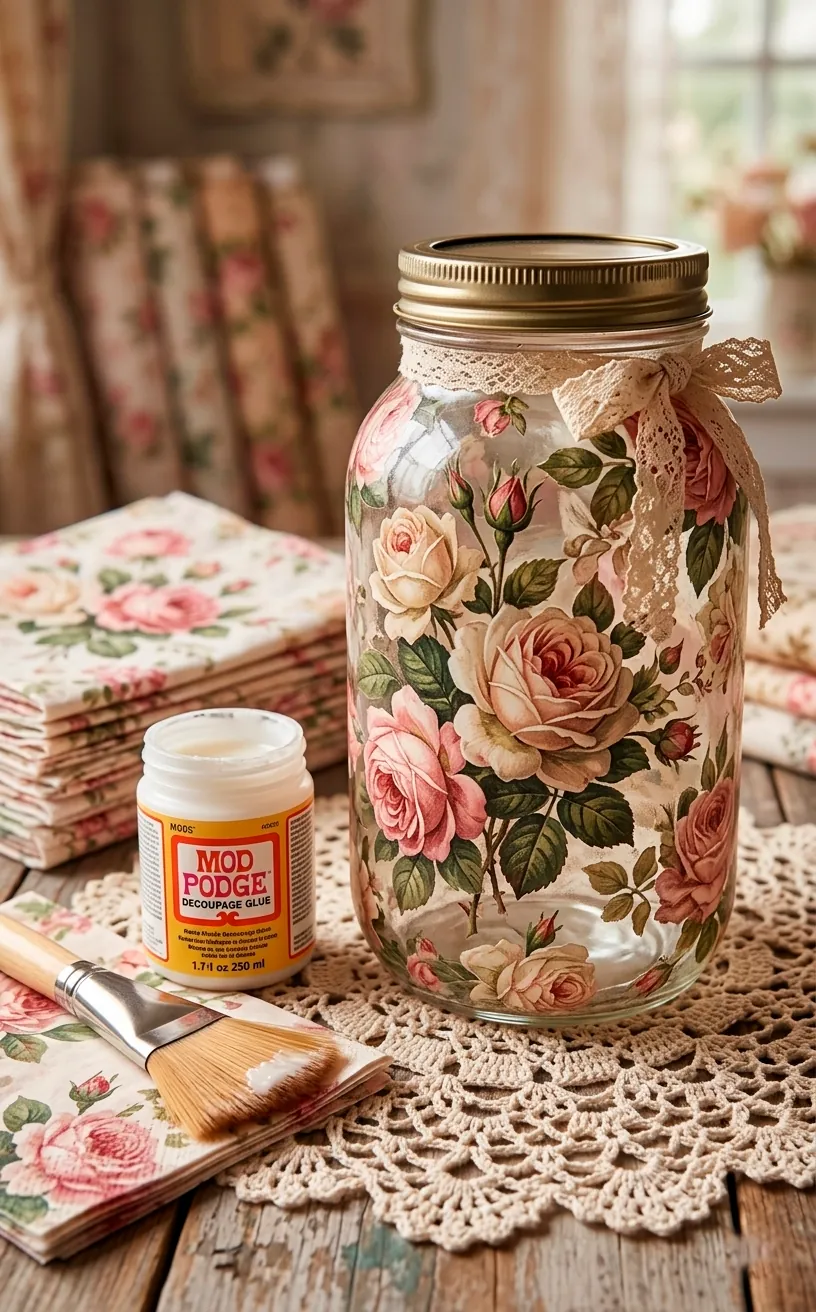
If solid colors feel a bit too plain for your taste, decoupage is about to become your new best friend. I personally love using vintage-style floral napkins or thin rice paper for this. You just separate the layers of the napkin until you have only the printed top layer. Apply a thin layer of Mod Podge to the jar, lay the paper down gently, and smooth it out with a soft brush. FYI, it’s going to wrinkle a little, but those tiny crinkles actually make it look like old porcelain once it dries. It’s a total game-changer for that romantic, Victorian aesthetic that moms usually adore. Who doesn’t love a bit of floral drama? 🌸
Hardware and Twine Finishing Touches
You can’t call it ‘vintage’ until you’ve added some rustic texture around the neck of the jar. I always keep a roll of jute twine or some scrap lace handy for this exact moment. Wrapping twine tightly around the rim covers those ugly screw threads that scream ‘I used to hold pickles.’
Want to level up? Add a small brass charm or a vintage button to the center of your twine bow. It’s those tiny details that separate the amateurs from the pros.
I once found a bag of old skeleton keys at a flea market and tied one to a jar vase—it was a total hit! Use a dab of hot glue to secure the ends so the twine doesn’t unravel the second Mom puts flowers in it. Just don’t burn your fingers; I’ve done it enough for both of us. lol.
The Faux Mercury Glass Hack
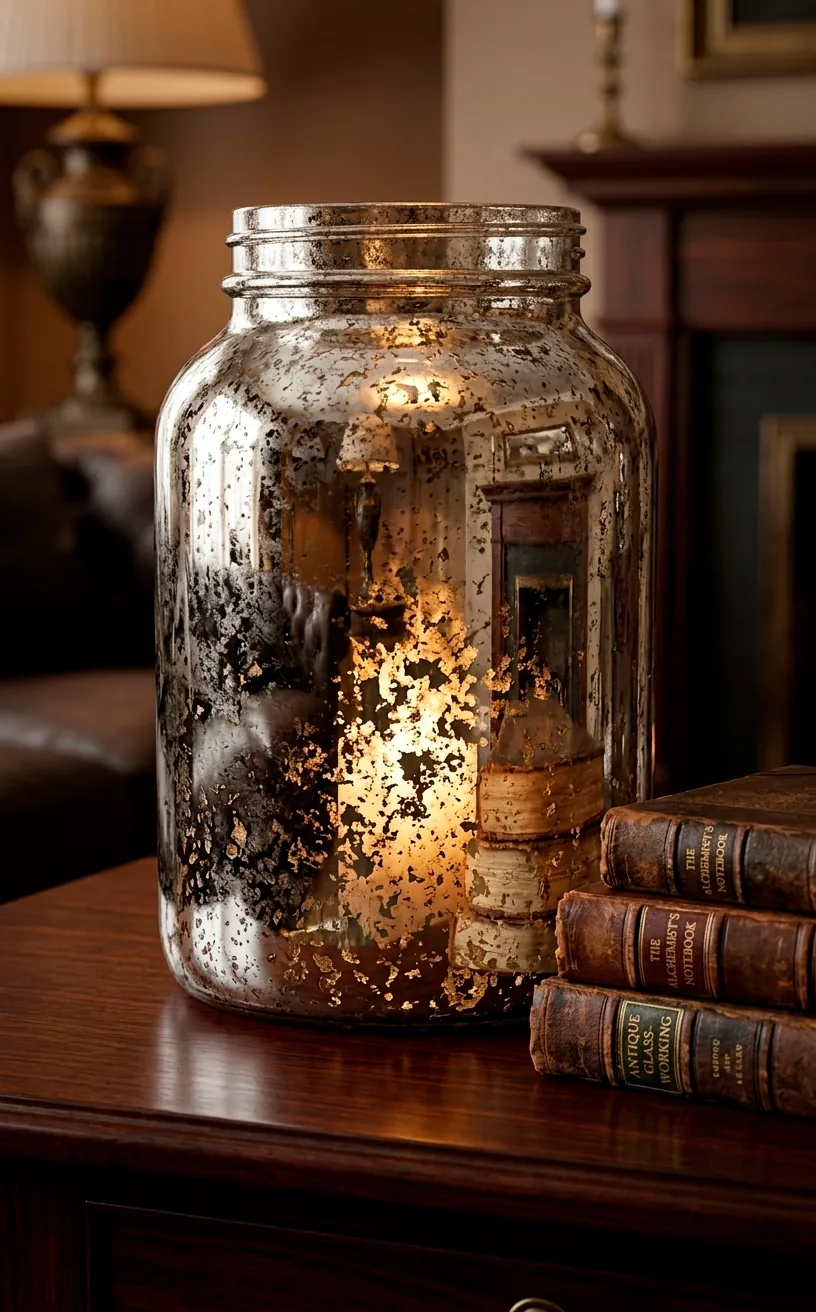
If you want something a bit more ‘glam vintage’ than ‘farmhouse vintage,’ you have to try the mercury glass trick. This looks incredibly expensive but it’s actually just a clever use of spray paint and water. Spray a light mist of water inside the jar first, then immediately spray a thin coat of metallic silver paint.
The water droplets prevent the paint from sticking in certain spots, creating that classic mottled, antique mirror look. I usually finish it with a quick blast of dark grey or black paint to add depth. Is it magic? Basically. It creates a stunning reflective surface that looks like it belongs in a high-end antique shop. Just remember to do this in a well-ventilated area unless you want to see neon colors for the rest of the afternoon.
Etching and Embossing for Elegance
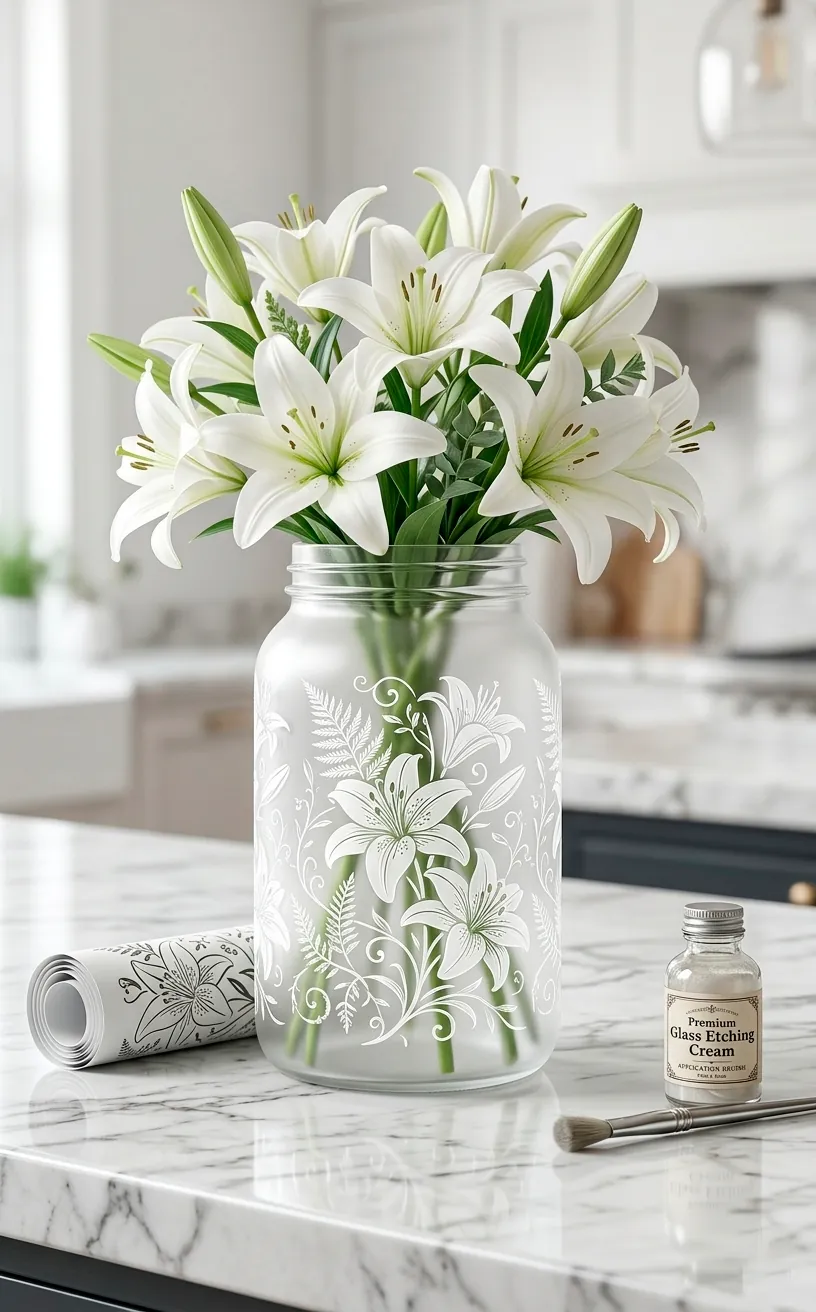
Did you know you can actually ‘carve’ designs into glass with cream? Etching cream is a total miracle worker for adding custom monograms or delicate patterns. Simply apply a stencil to your jar, slather on the cream, and wait a few minutes. When you wash it off, you’re left with a permanent, frosted design that looks totally professional.
It’s a great way to personalize a gift. Imagine Mom’s initials or a simple ‘Home’ script etched into the glass.
IMO, this is the most sophisticated-looking technique in this whole guide. Just be careful with the cream as it’s quite acidic, so wear gloves and don’t get it on your favorite sweater. If you like this custom look, you might also enjoy exploring 15 botanical wall art ideas to complement your new vases.
Filling with Vintage Intention
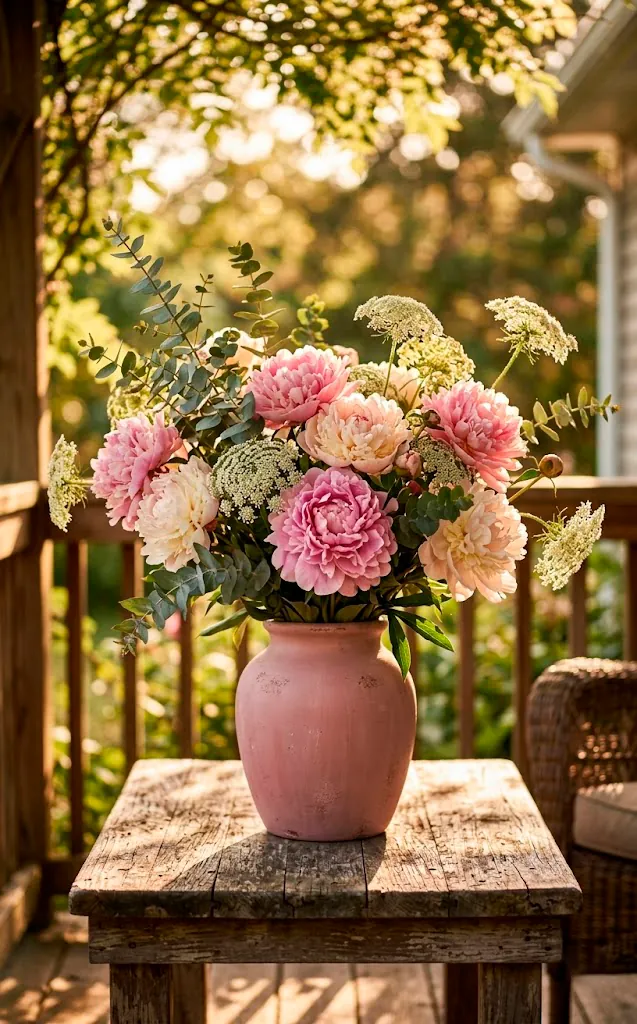
The vase is only half the battle; the flowers do the rest of the heavy lifting. To keep that vintage vibe going, I stay away from stiff, modern arrangements. Instead, think wild, romantic, and slightly messy. Dried lavender, eucalyptus, or big, blustery peonies work wonders. Mix in some delicate baby’s breath for a soft, airy look that feels like a garden picked specifically for her. If you’re using the mercury glass or dark painted jars, white flowers pop like crazy. For the sage or pastel jars, try deeper pinks or even dried wheat for a more rustic, harvest-style aesthetic. It’s all about the mood! 💐
Gifting and Boutique Presentation
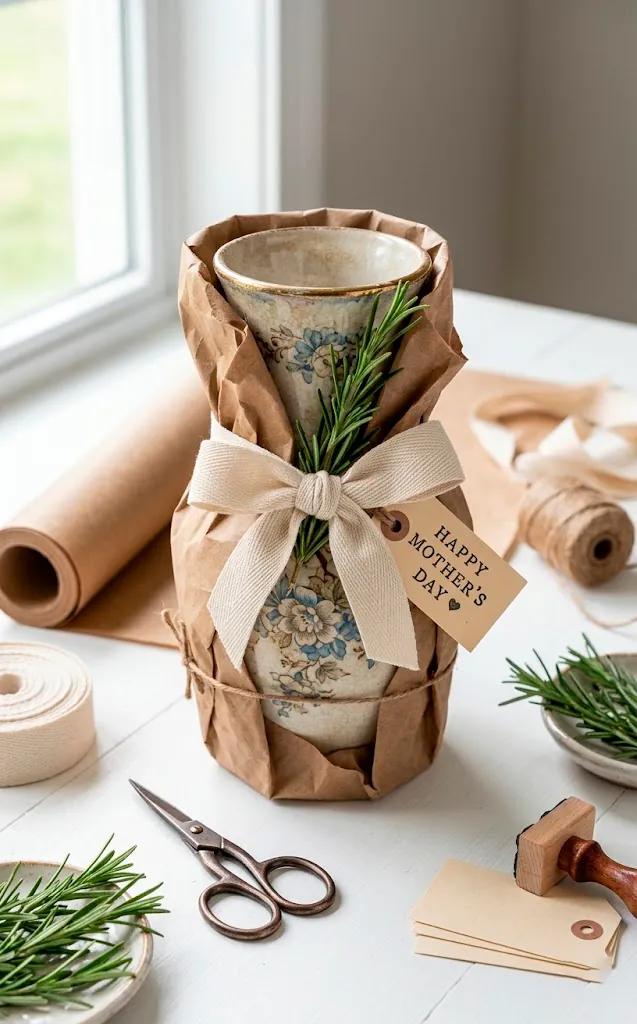
If you’re giving these as a gift, the packaging matters almost as much as the vase itself. Don’t just hand it over in a plastic grocery bag—we’re better than that! Wrap the vase in brown kraft paper or a piece of cheesecloth for an extra layer of rustic charm.
I like to attach a handwritten tag with a bit of the leftover twine. It makes the whole thing feel like it came from a fancy boutique in the city.
Did you know that presentation can actually make a gift feel more valuable? It’s true! A simple sprig of fresh herbs tucked into the ribbon adds a lovely scent and a pop of green.
Trust me, Mom is going to be way more impressed when she sees the effort you put into the details. You can even include a little note explaining which jars you used. It’s a great conversation starter and shows you didn’t just grab the first thing you saw at the store. It’s the little things that count, right?
Styling Your Masterpieces at Home
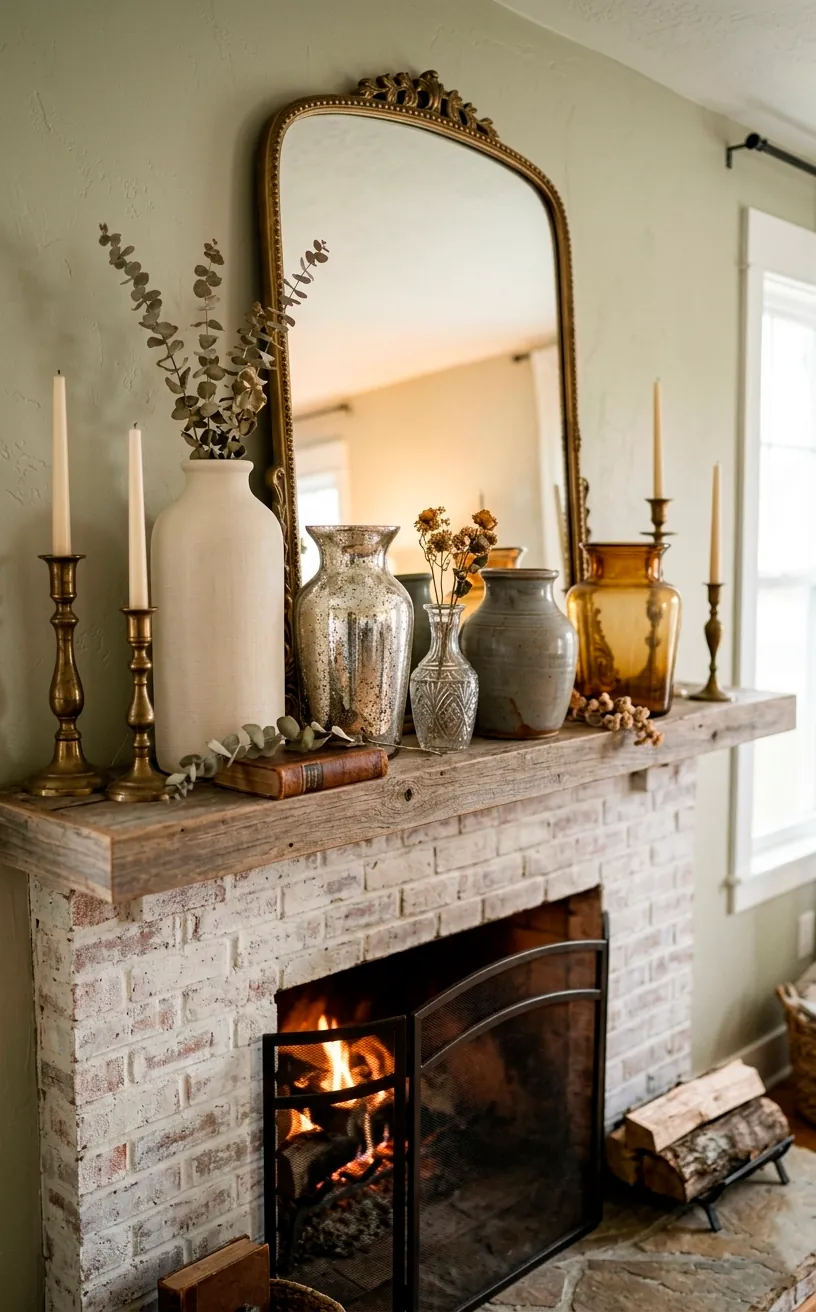
Once Mother’s Day is over (or if you’ve decided to keep a few for yourself—no judgment here), how do you style them? I love grouping them in odd numbers, like threes or fives, on a mantel or a dining room table.
They also look amazing on a tiered tray in the kitchen or as a centerpiece for a brunch setup. Try mixing the painted jars with clear ones to keep the look from feeling too heavy.
Ever thought about using them in the bathroom? They make the most stylish holders for cotton balls or makeup brushes. The vintage aesthetic is incredibly versatile, so don’t feel like they can only hold flowers. My jars currently hold everything from pens in my office to spoons on the coffee bar. They basically fit anywhere that needs a little soul. lol.
Ready to Get Crafting?
Repurposing old jars is honestly one of the most satisfying DIY projects out there. You get to clear out your clutter, save some serious cash, and create something genuinely beautiful for the most important woman in your life. Whether you go for the distressed chalk paint look or the fancy mercury glass hack, Mom is going to cherish the effort you put in. So, which technique are you going to try first? Let me know in the comments, and don’t forget to share your finished masterpieces with me! Happy crafting and Happy Mother’s Day! ✨
Related posts
See AllEarthy Terracotta Sunroom Ideas for a Mediterranean Vibe
Transform your space into a sunny European retreat. Discover simple, earthy terracotta sunroom ideas that bring authentic Mediterranean vibes straight …
Read more15 Playful Memphis Style Attic Loft Ideas with Graphic Shapes
Transform your attic loft with playful Memphis style decor! Discover 15 bold ideas using graphic shapes, vibrant colors, and quirky …
Read more15 Custom Built-In Bed Ideas for a Luxury Kids Room
Ready to transform that chaotic playroom into a high-end sanctuary? Discover 15 jaw-dropping built-in bed ideas that blend luxury, smart …
Read moreA Step-by-Step Guide to Total Laundry Room Organization
Transform your chaotic laundry space into an organized, functional oasis with this step-by-step guide. We share smart storage hacks, sorting …
Read more